The #FabFam is off to our next adventure today… a road trip around the U.K.! Since my kids are already road trip and travel troopers, we have found lots of ways to keep them entertained and happy on long trips (see my tried-and-true tips for surviving road trips with young children in this post here, and how to make a DIY road trip activities folder for toddlers and young kids here). Since this trip takes us on a plane before a two-week road trip journey in foreign countries, I had to think and pack differently to organize ourselves. I was inspired recently when I saw this Simple Road Trip Hack post on Modern Mom Life, and decided to try this project, and make it work for my two young sons. Today I am sharing how I turned one simple over-the-door shoe rack into two hanging car organizers for kid’s road trip activities and snacks.

Disclosure: This post contains some sponsored and affiliate links, which means that if you make a purchase using the links, I may receive a commission. This does not cost you anything additional.
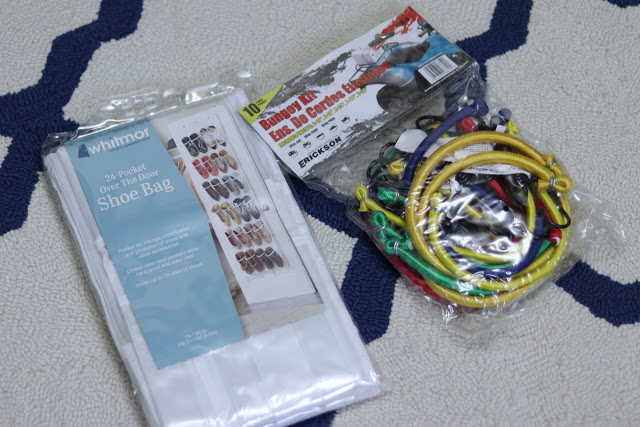
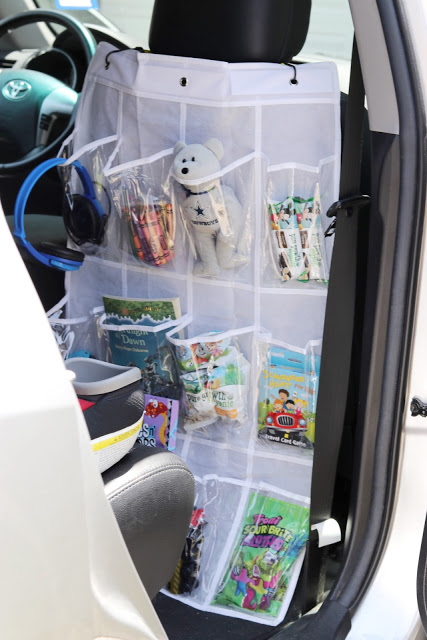
- 24-pocket over-the-door shoe organizer (affiliate link)
- Multi-size pack of bungee cords (affiliate link)
- Scissors
- Cardboard
- Hole punch
- Glue gun with glue
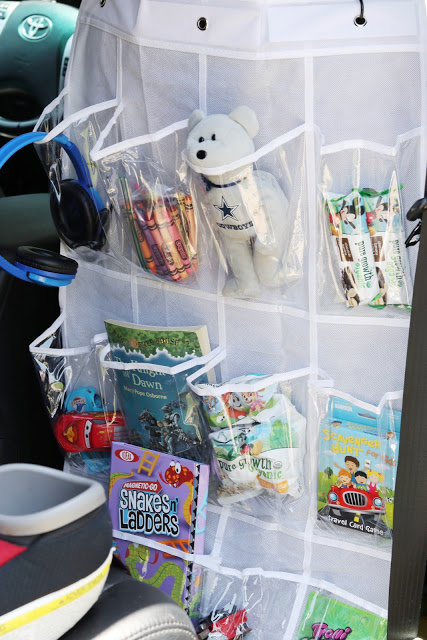
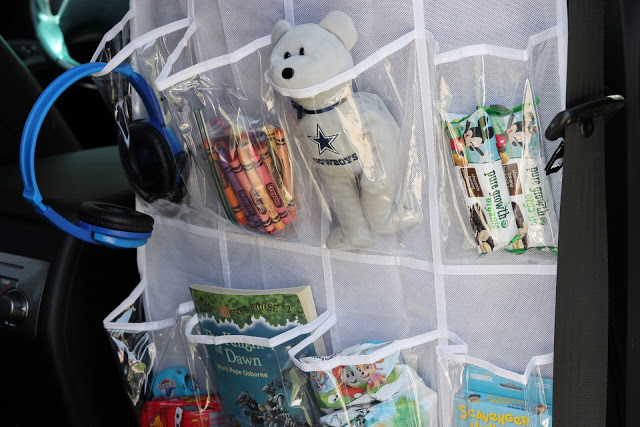
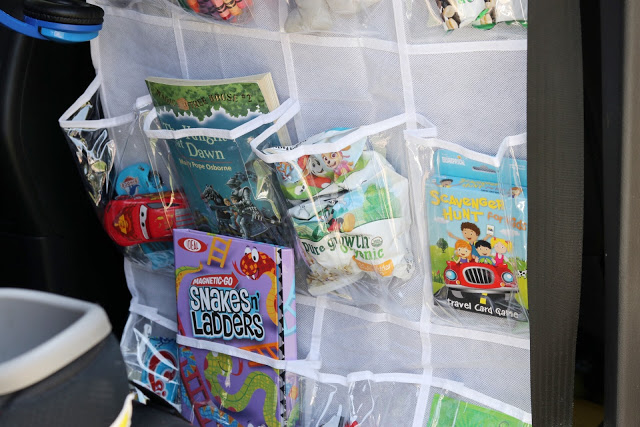
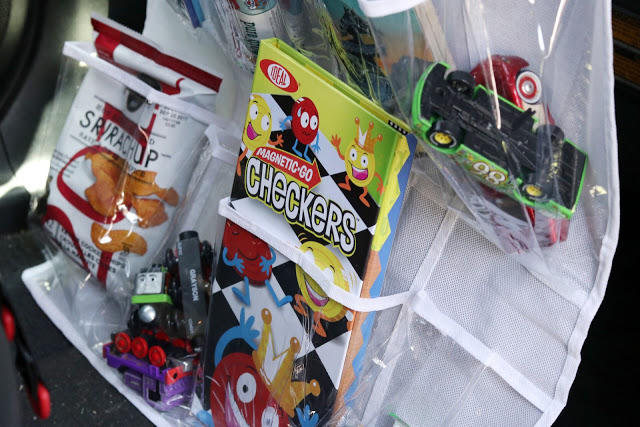
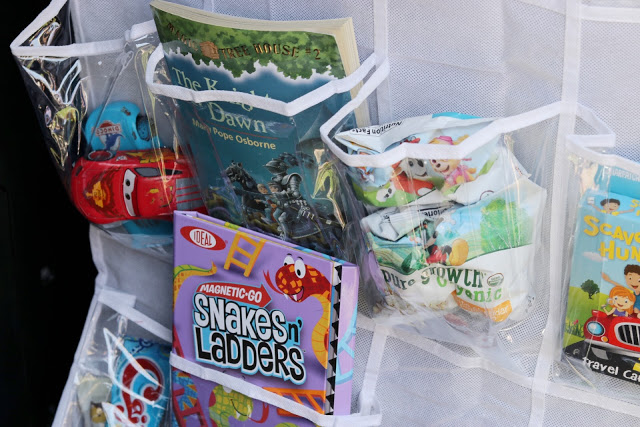
- Snacks, small books, toys, and crafts (I love these magnetic car games: hangman, checkers, battleship, travel scavenger hunt, snakes and ladders, go fishing)
Instructions:
- Remove the shoe organizer from its packaging, and discard the over-the-door hooks.
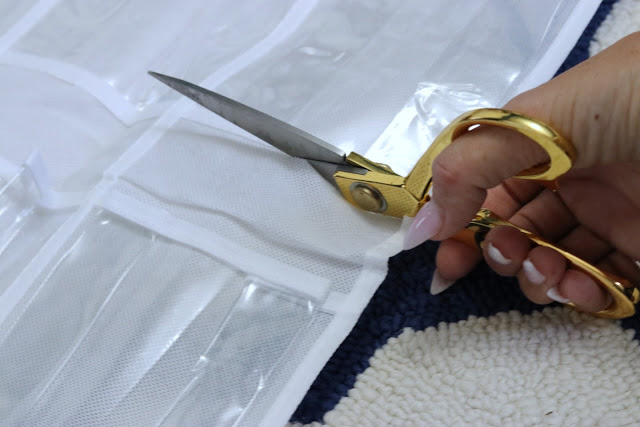
- Using a good pair of scissors, cut the bottom half of the shoe holder from the top half, just below the seam to create two separate sections of 12 compartments each.
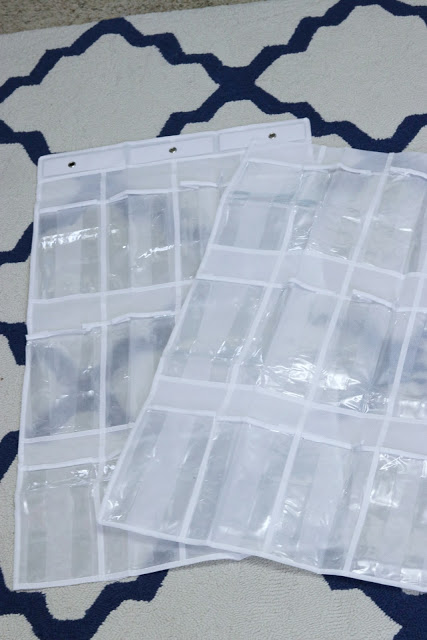
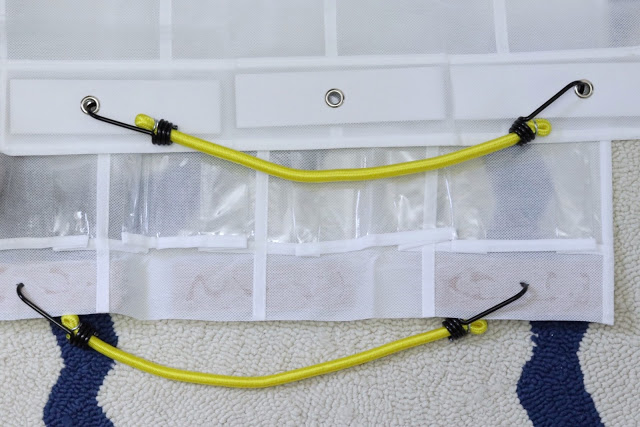
- Since the top half already includes reinforcement and grommets to hang the rack, you will need to create something similar for the bottom half.
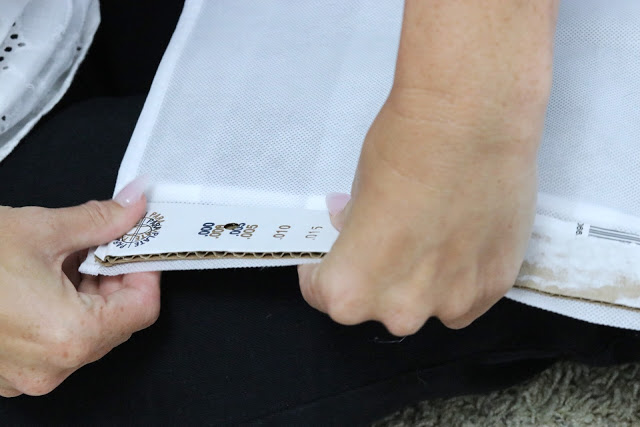
- First, cut some pieces of recycled cardboard into strips to fit on the back half of the top section of the newly cut half of the shoe rack.
- You only need pieces on the left and right, but I also included one for the center to add more rigidity to the organizer overall.
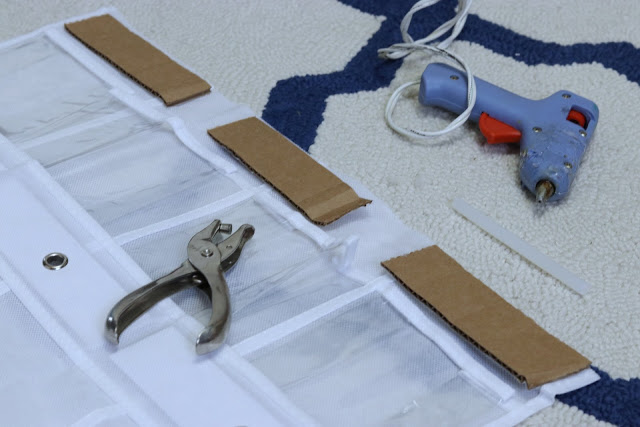
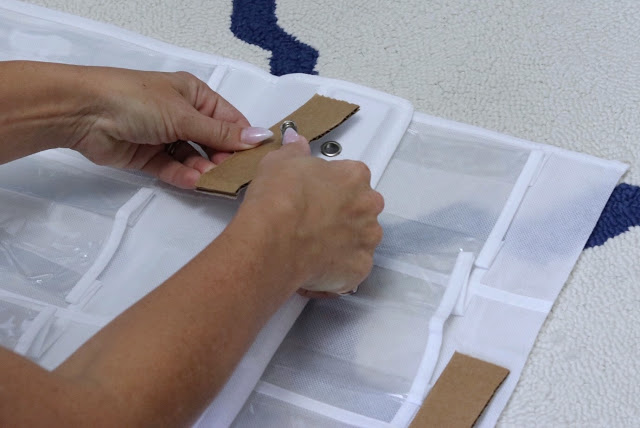
- Use a hole punch to punch holes in the left and right cardboard pieces in approximately the same spot as the grommets from the top half.
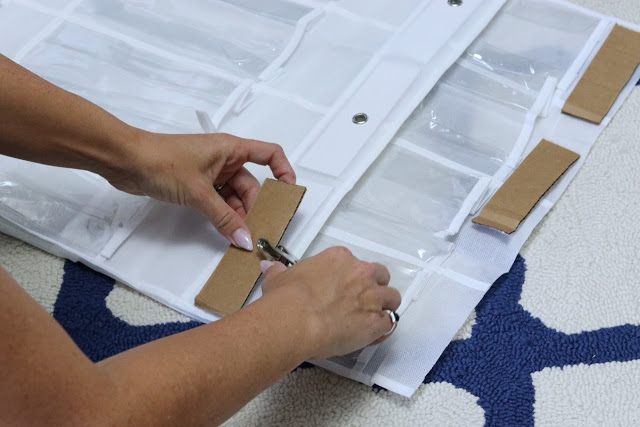
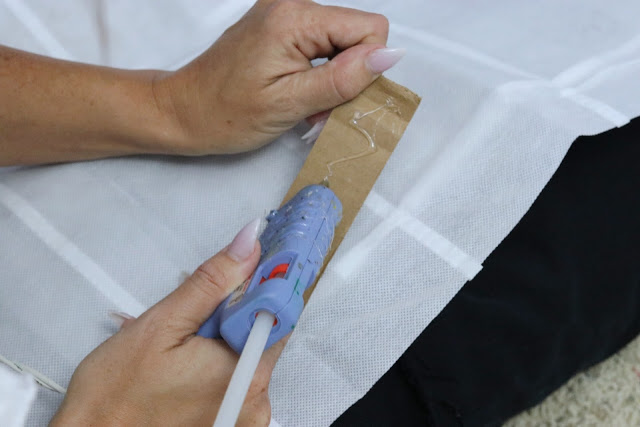
- Adhere the cardboard to the back of the organizer using a glue gun.
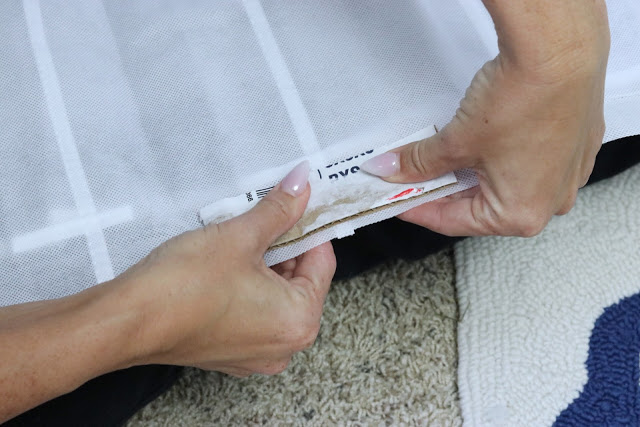
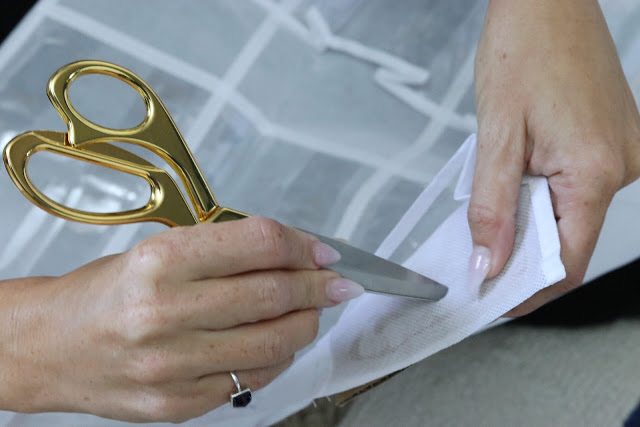
- Use your scissors to poke holes in the fabric where your hole punches are in the cardboard.
- Now, add bungee cords into the outer two grommets and holes.
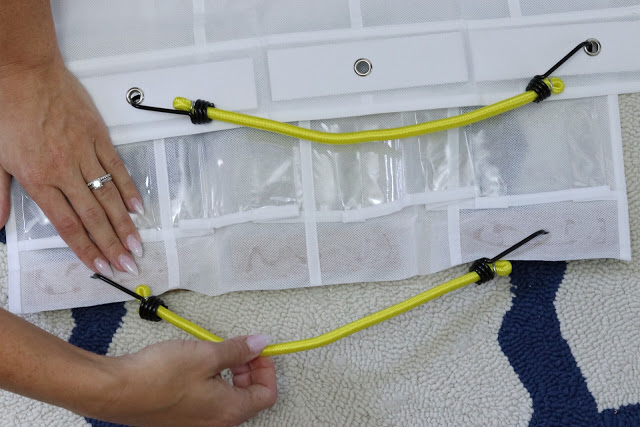
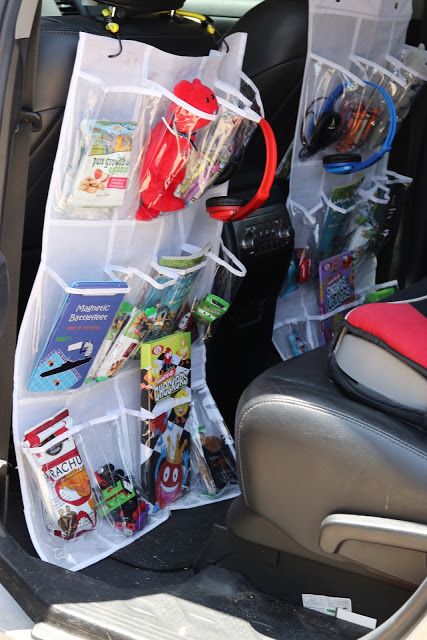
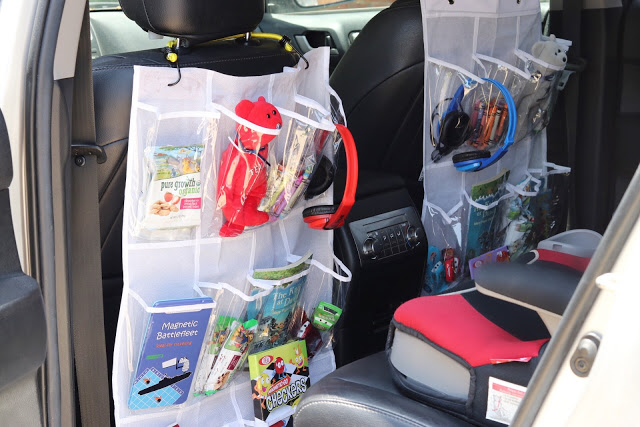
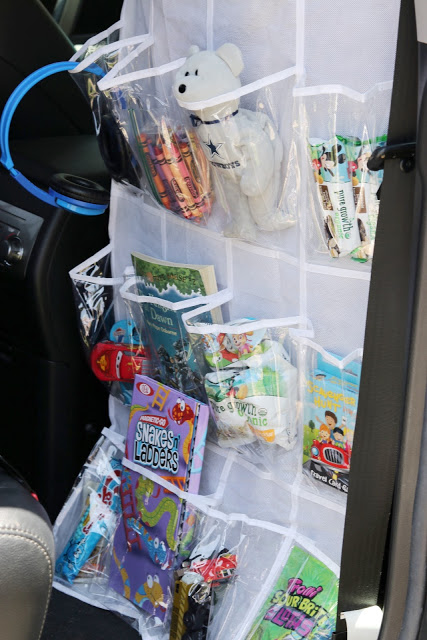
- The hanging organizers are now ready to hang on the back of the car’s captain’s chairs!
- Fill the pockets with snacks, toys, small activities, and technology accessories (such as charging cables and headphones).
Bonus Tip: If you’re planning a road trip with a rental car, especially in a place like Dubai where
car rentals are popular, organizing your car can make all the difference. With services like
Renty, it’s easy to secure the perfect vehicle for your journey. And with an organizer like this,
you can keep your rental car clean and clutter-free, making the drive more enjoyable as you
take in the stunning desert landscapes or the city’s modern skyline.
We are ready to break this in when we arrive in London tomorrow! Follow @fabeveryday on social media to follow our adventures, and of course look for a recap on the blog soon. In the meantime, remember to share and pin this project for later when you are planning your next family road trip!
More family road trip tips:
- Family Road Trip Packing List
- Tips for having the best, low-stress family road trip (including lots of car activities for toddlers and young kids)
- DIY road trip activities folder for toddlers and young kids
Family road trip route ideas:
- California 1 Pacific Coast Highway Road Trip: Big Sur Coastal Drive Stops
- Family Route 66 Road Trip
- Road Trip from Austin to New Orleans
- Family Road Trip from Texas to California
- Southern USA Family Road Trip Route and Recommendations
- Route and Recommendations for a Road Trip Through the U.S. Southwest
- Itinerary and Recommendations for a Family Road Trip from Texas to Washington, DC
- Route and recommendations for planning the ultimate Midwest baseball road trip

[…] Super Easy DIY Hanging Organizer for Your Next Family Road Trip […]