For Father’s Day a few years ago, I decided to make a cinder block BBQ table for my husband to coordinate with our DIY cinder block bench, our cinder block raised garden bed, and our DIY cinder block plant bench. We love the way the light gray of the cement blocks and the rustic touch of the wood parts look with our French country-inspired budget patio makeover, and cinder blocks (AKA “concrete blocks” or “cement blocks”) are also really cheap and easy to work with. This results in a very quick, easy, and budget-friendly DIY BBQ prep table project! If you’re looking for unique ideas for an outdoor prep table for grilling, I’m sharing the details on how to make this outdoor cinder block table, which works perfectly as a DIY grill prep table. This DIY outdoor prep table would also work as a gardening potting bench!
Disclosure: This post contains some affiliate links, which means that if you click on one of the product links and make a purchase, I may receive a commission. This does not cost you anything additional, and helps me to keep the rest of my content free, so thank you!
More DIY outdoor projects using concrete blocks like this DIY grill prep table
If you’re looking for more cinder block table ideas or outdoor decor using concrete blocks, check out these related projects:
What you need to make an outdoor prep table for grilling

Here are the supplies you’ll need to make this cinder block table to use as a DIY outdoor prep table for grilling:
- 12 cinder blocks, AKA concrete blocks (I used these 8″x8″x16″ concrete blocks from Home Depot at about $2 each)
- 48″x24″ piece of piece of unfinished plywood (I got a 1″ thick piece from Home Depot, but there are lots of options for thickness… just don’t go too thin as it needs to support a row of blocks and act as a shelf)
- 48″x25″ finished butcher block countertop (I got this one from Home Depot, available in different finishes)
- 48″x1″ dowel (I got this one from Home Depot, sanded and ready to finish)
- Thompson’s Waterseal
- Liquid Nails construction adhesive
- Roll of paper towels
- Roll of butcher paper
- Storage boxes (the ones pictured are from IKEA and no longer available, but here’s a similarly-sized box on Amazon)
- Galvanized steel buckets to hold utensils (I used these small Socker plant pots from IKEA)
- Optional: Hooks to attach to the side of the wood for hanging tools or dish towels
- Grill tools (this is a great reasonably priced set from Amazon)
- Cutting board
- Oven mitts
- Waterproof table cover (it’s not easy to find a cover that will fit this 25″x48″x34″ table exactly, but I’ve found that firepit covers like this one can fit around the top)
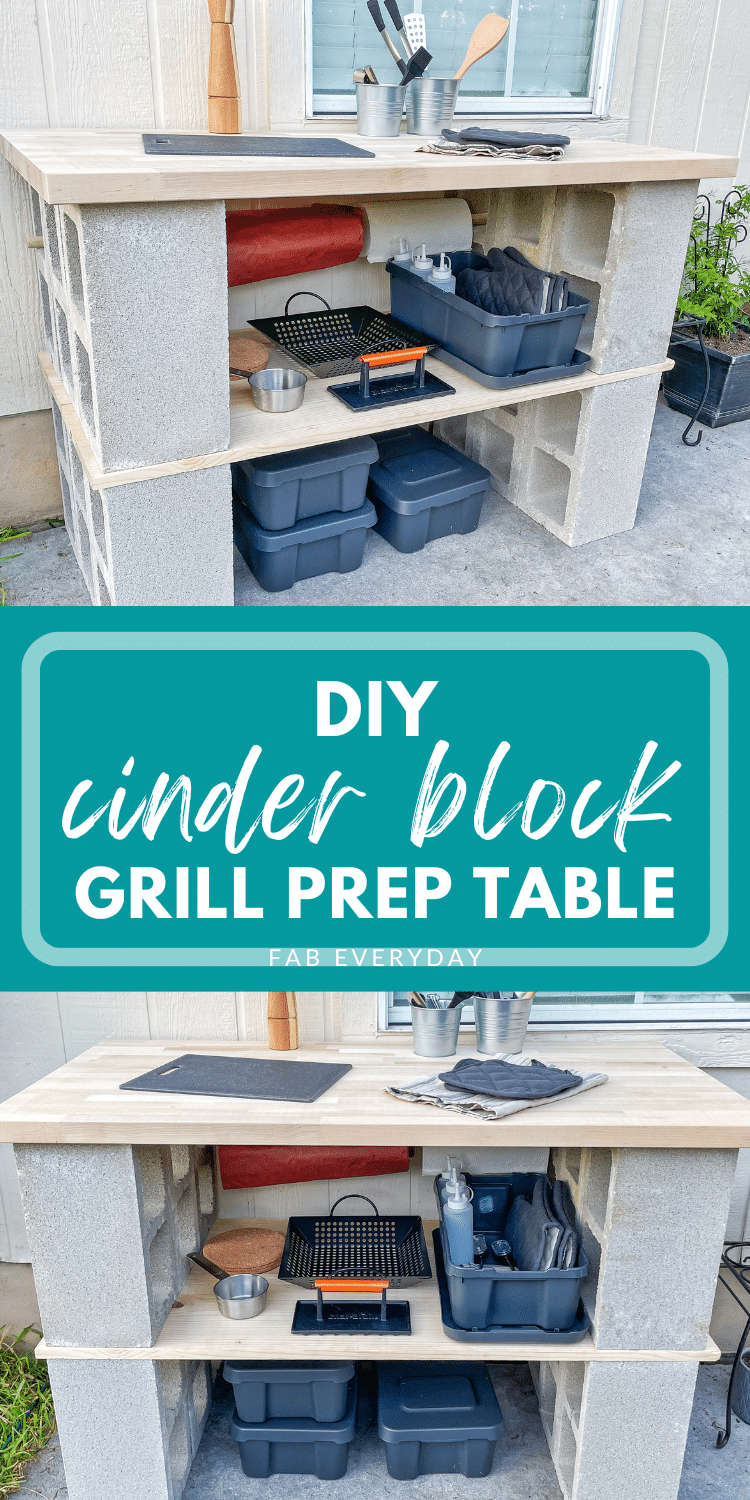
How to make an outdoor cinder block table

This cinder block outdoor table is a very quick and beginner-friendly outdoor prep table DIY. Here are the step-by-step instructions for making this DIY grill prep table using cinder blocks (AKA concrete blocks).
- Coat the plywood and dowel (not the butcher block countertop; just the plywood and dowel) with Thompson’s Waterseal to protect them from the elements. I used clear because I really liked the natural wood look, but you can also get some that are tinted for more of a stained wood look. Allow to dry per directions.
- Optional: I personally like the way the light gray of the cement blocks look with our French country-inspired budget patio makeover (so we left them as is), but you can also paint the blocks any color you like to match your outdoor decor color scheme.
- Determine the placement of your table so you can set down the first row of concrete blocks where they will go. Place 3 blocks (standing upright vertically) on each side, separated at a distance that could easily hold the piece of plywood on top with about an inch of wood to spare on all sides.
- The blocks are heavy, and didn’t seem like they were going anywhere, but for some added structural stability (and since our kids run around our yard), we adhered the blocks together with Liquid Nails.
- Place the piece of plywood on top of the concrete blocks, followed by 3 more concrete blocks on each side, directly on top of the first row of blocks. Adhere the next row of blocks together with Liquid Nails.

- Place the dowel through the one side of the top-back hole in the top row of concrete blocks. Add the roll of butcher paper and the roll of paper towels onto the dowel, then push the dowel through the hole on the opposite concrete block so that the dowel can rest in the holes on each side.
- Place the storage boxes onto the wooden shelf. Use them to store grilling tools, thermometers, seasonings, cleaning supplies, kitchen towels, aprons, etc.
- Add grilling tools to the pails and place on top of the butcher block countertop with a cutting board.
- Optional: Screw hooks into the side of the wood for hanging tools, towels, or aprons.

We love how our cinder block grill table came together! If you make a DIY outdoor prep table, I’d love to see it, so tag us on social media at @fabeveryday to show off your work!

Leave a Reply