
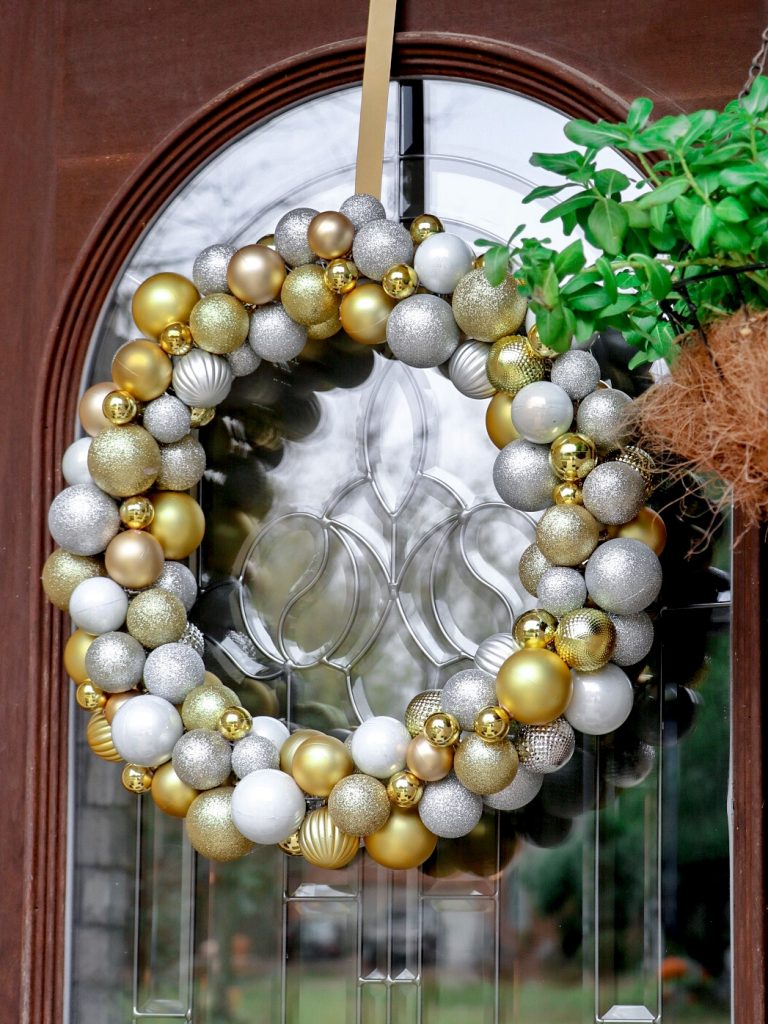
I love the look of mixed metallics for the holidays. There’s just something so classy about the combination of gold and silver. Today I’m sharing instructions for making a DIY Christmas ornament wreath using gold and silver ornaments from the dollar store and a few other tools you might already have at home. This DIY Christmas ball wreath was made for my front door. I made a smaller version several years ago to display with this white, silver, and gold mixed metallic Christmas mantel, and loved it so much that I thought I would do a slightly bigger one for the front door this year. You’ll definitely want to pin these instructions for how to make an ornament wreath – it’s super easy and very cost-effective, while also being a gorgeous high-impact holiday décor piece.
What you need to make a DIY Christmas ornament wreath
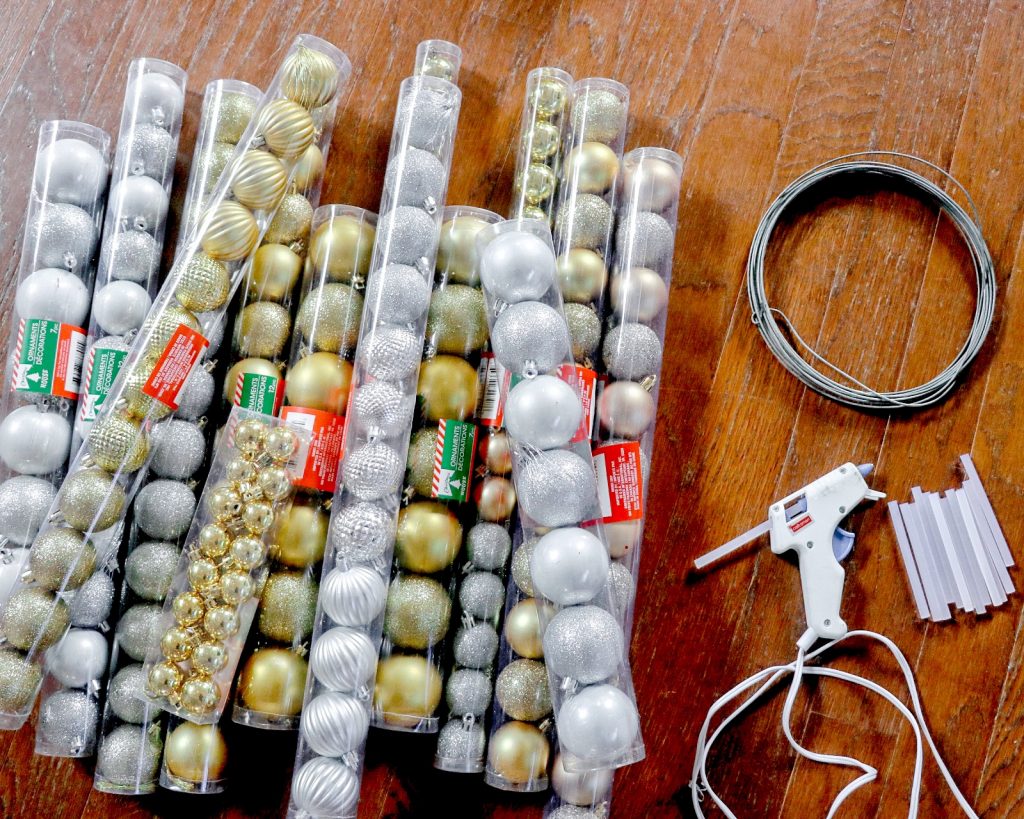
- Gold and silver Christmas ball ornaments from the dollar store in varying sizes and textures. Make sure to get a pack of really small ones (you’ll see why later). I got all of these from Dollar Tree and had some leftover after making the DIY Christmas ball wreath.
- 60″ of thick gauge wire (you will need 60″ of wire to make this 22″ diameter wreath)
- Glue gun and glue sticks
That’s all you need to make this Dollar Tree ornament wreath!
How to make an ornament wreath
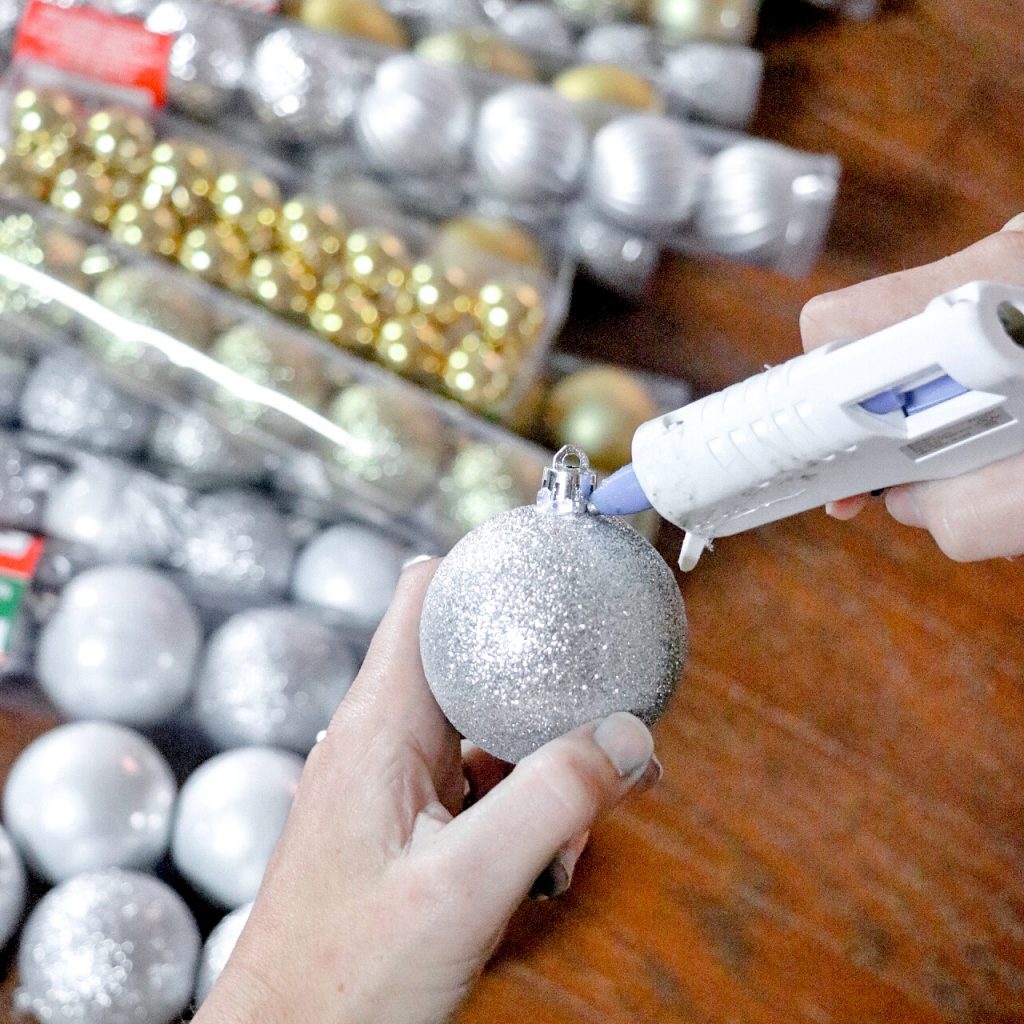
- Using a hot glue gun, glue the tips onto each ornament. Otherwise, they come apart easily while you’re adding them to the wreath.
- To make a 22″ wreath like mine, you will need to cut a 60″ of strip of wire. Make a small hook at one end of the wire by bending it to keep ornaments from sliding off of the end.
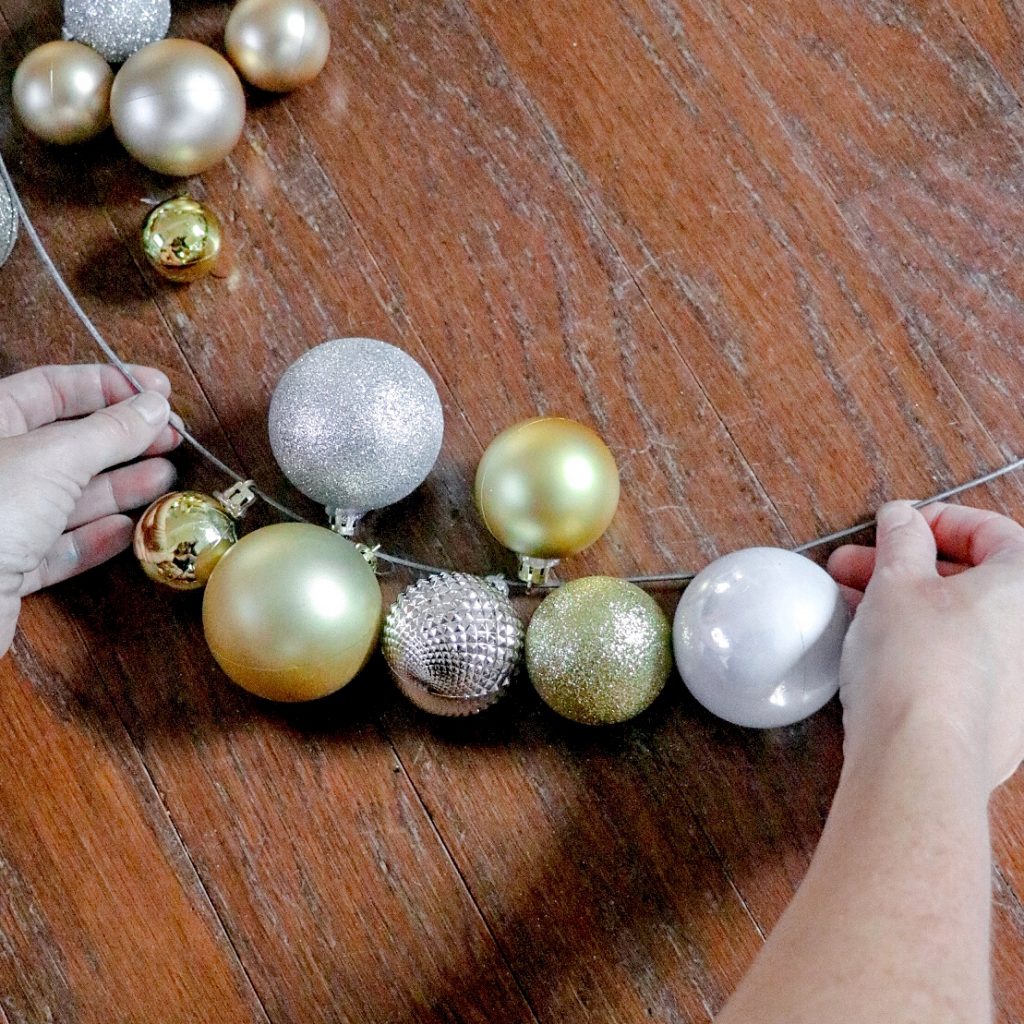
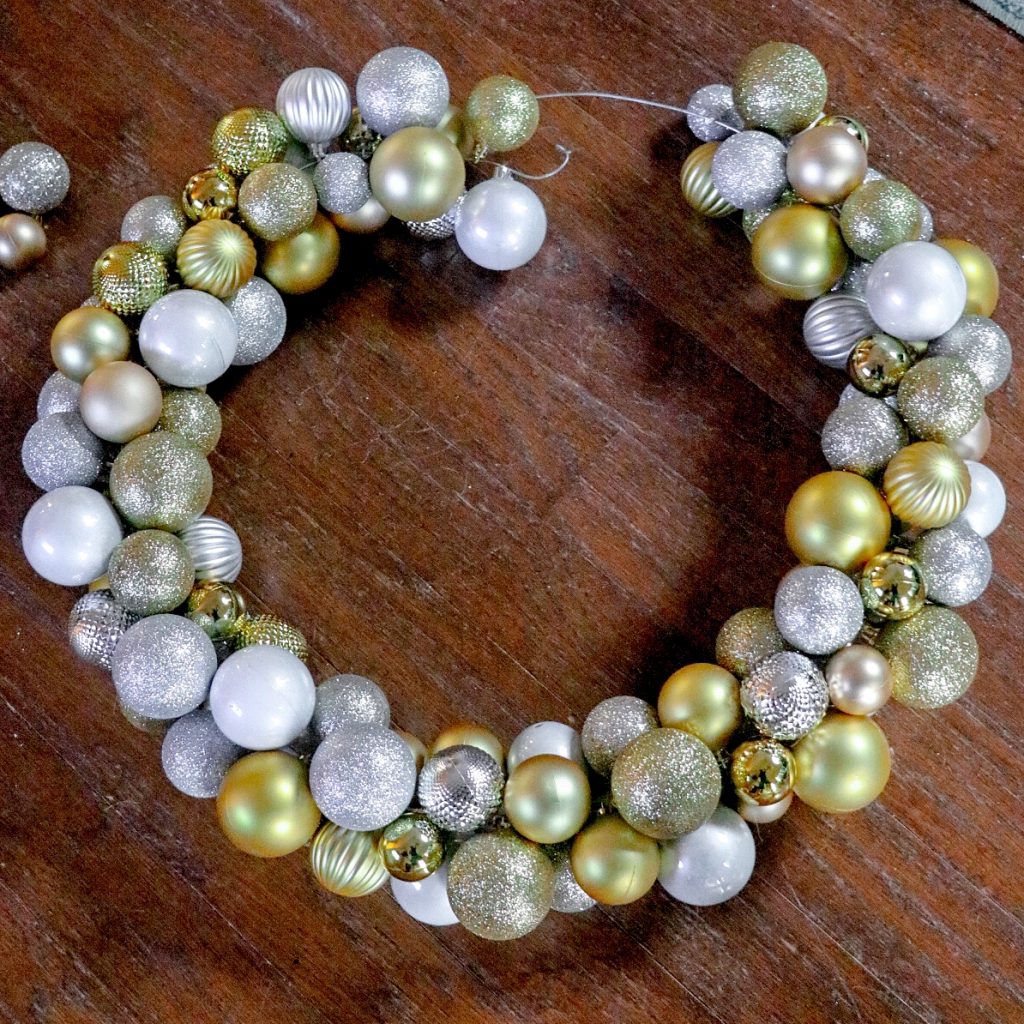
- String ornaments onto the non-hooked end of the wire, one at a time. I used a mix of all the ornaments except the ornaments from the pack of really small ones (set those aside; you will need them later). You can mix different sizes and textures, though I found it effective to layer two gold, then two silver, and so on. I tried not to put the texture pieces too close together as I didn’t have many and wanted to space them out.
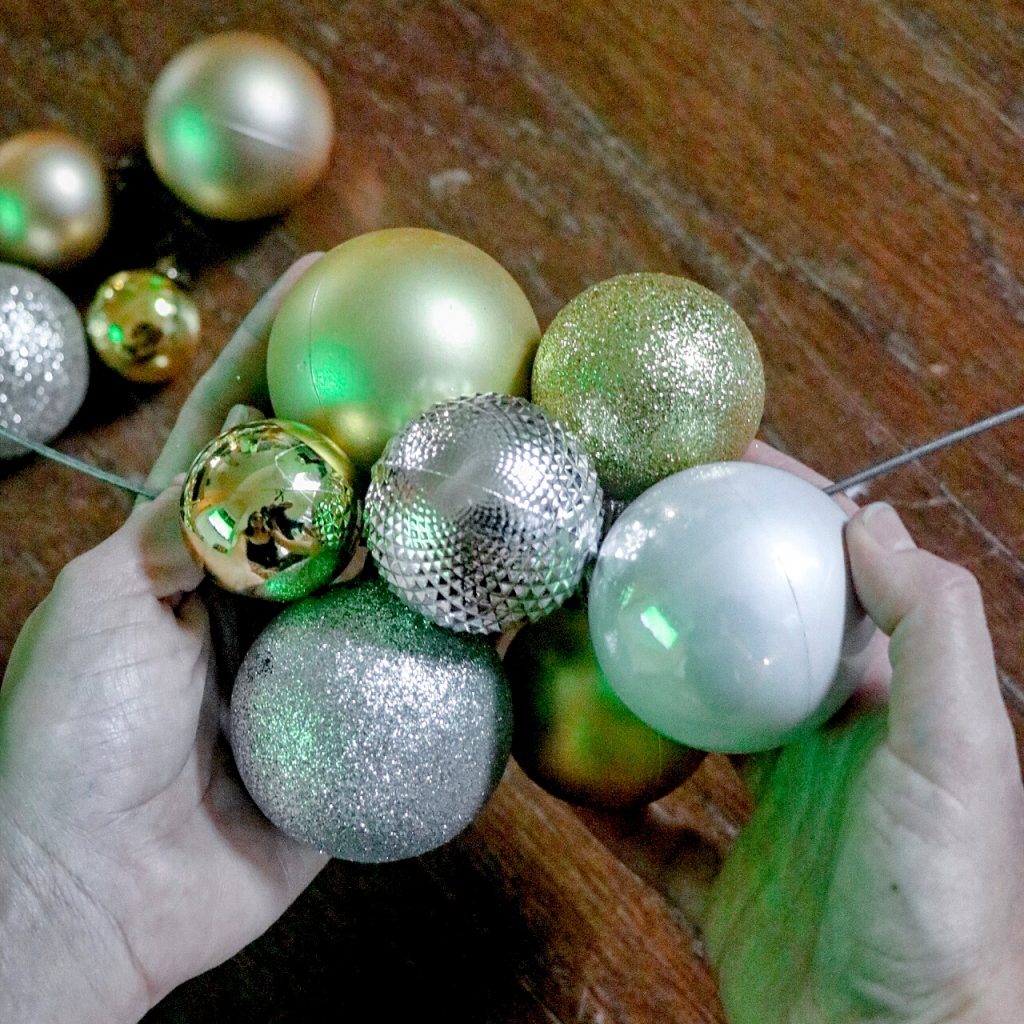
- In the previous picture you will see that the Christmas balls sit kind of separately while you are stringing them onto the wire. To get the full, rounded effect of this DIY Christmas ornament wreath, you will need to bunch them together. Every eight or so ornaments, bunch the grouping together by twisting the ornaments in different ways until they are positioned evenly and aesthetically (not having two of the exact same ornaments right next to each other, for example), then slide them to the hooked end of the wire, leaving an inch or two of space.
- Repeat with the next sets of ornaments, pushing to connect and bunch up with the grouping before it.
- Stop stringing the ornaments when you have about 4″ of wire left.
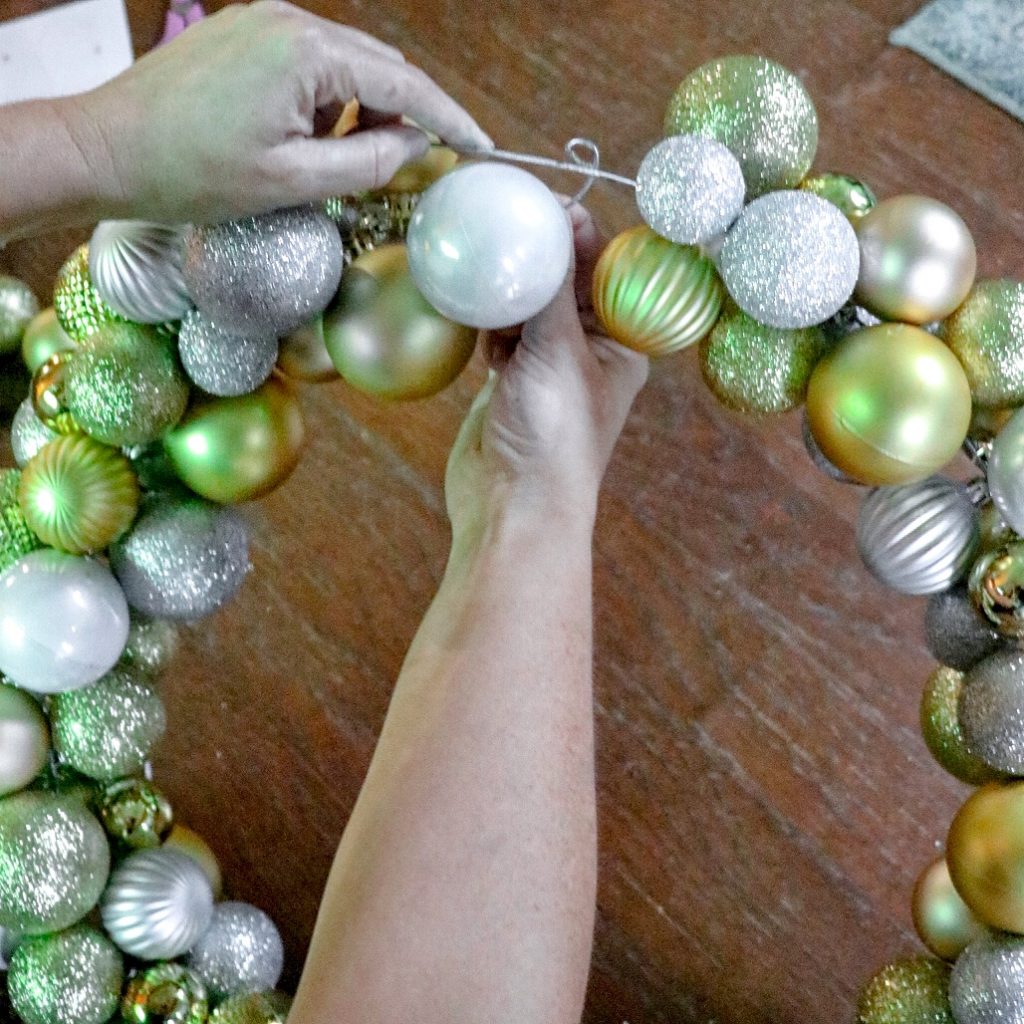
- Now it’s time to connect your DIY Christmas ornament wreath. Overlap the groups of ornaments at each end slightly to avoid a large gap in the wreath, then using the hook you creating, connect the wire pieces together. Twist the non-hooked end around the other wire by carefully wrapping it around a few times between ornaments. You may have a small gap at this part of the wreath, but don’t worry; you will have the chance to fix that later.
- If the wreath seems misshapen at all, carefully bend the wire as needed and twist some of the ornament groupings into a better position.
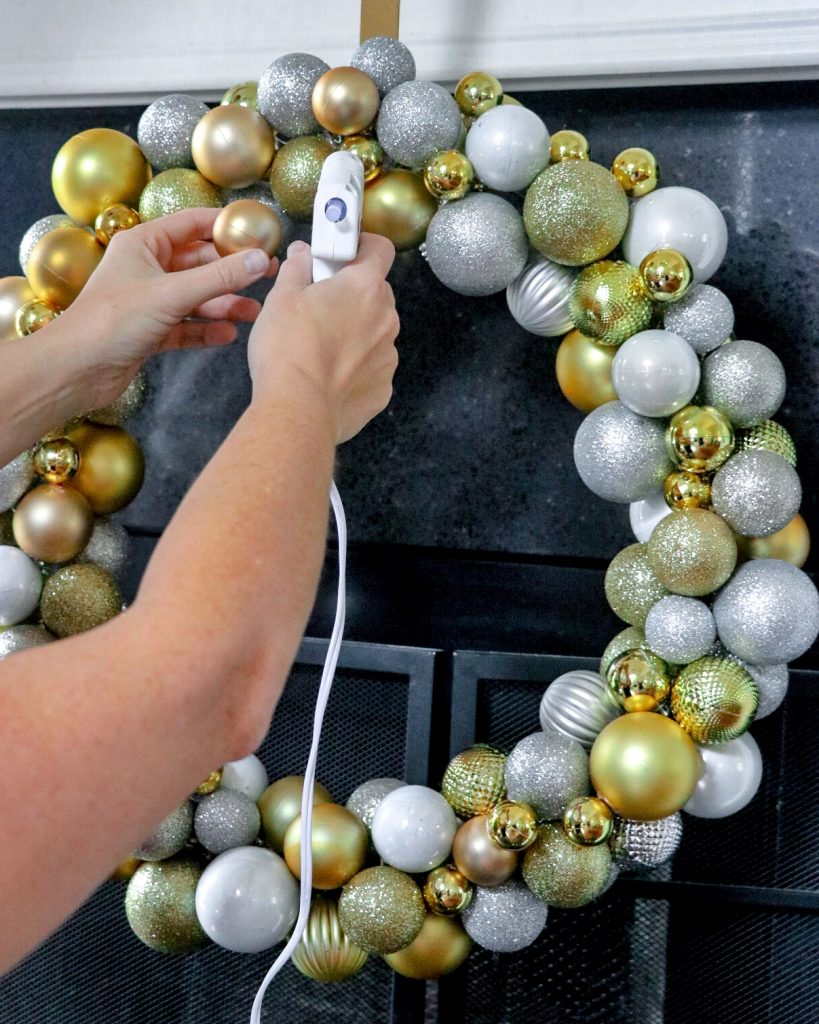
- Hang the wreath onto a wreath hanger, using the double-wire section (where it connected to itself) as the top point on the hanger. This will allow you to see the whole wreath as it will sit on a hanger in order to finetune the design.
- Using a hot glue gun, attach various balls together if any of the sections seem loose so they don’t twist and distort the shape of the wreath.
- If there is a gap in ornaments at the top where the wire connected (which is common since you might have needed some wiggle room to connect the two ends of the wire), manually hot glue extra ornaments together in that spot to close the gap.
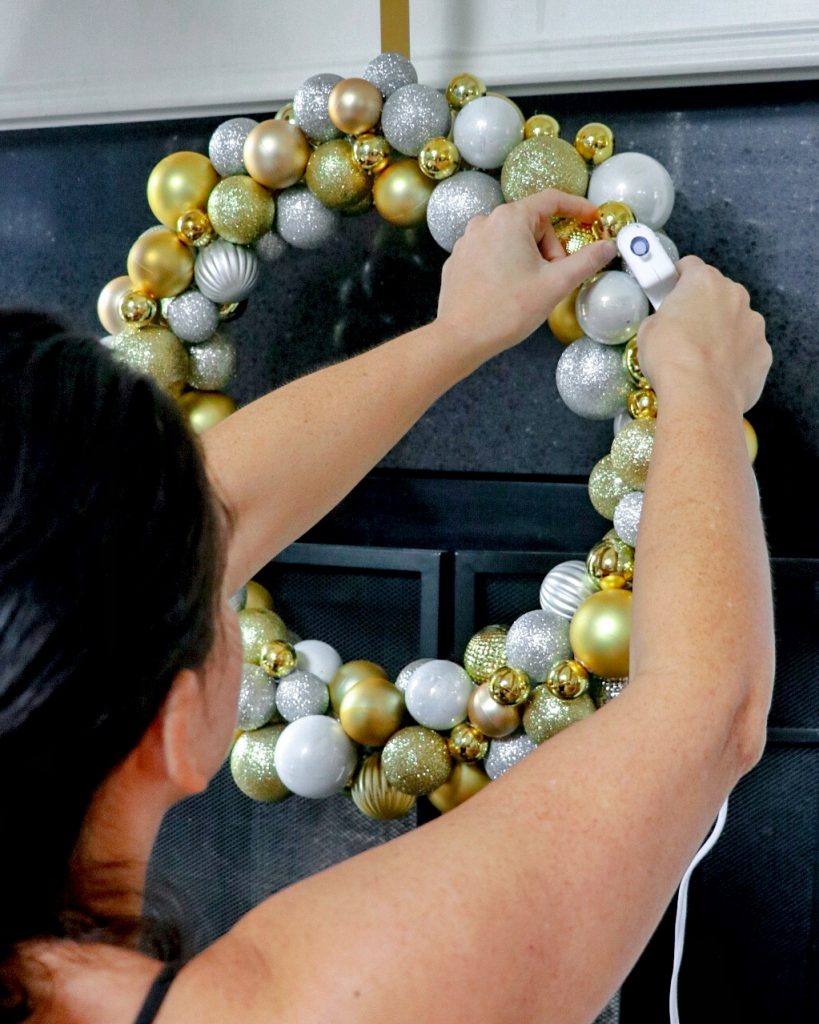
- This is the point when the really small ornaments that you set aside come back into play. Take a look at the wreath from the front as it will be hanging. You will notice a few gaps where you can see the wire between ornaments, or points where the wreath just doesn’t look as symmetrical as you’d like. Hot glue these small ornaments over spots where you can see the wire, around the perimeter where you want to add some additional width for symmetry, or in places where you want to break up the texture or color pattern.
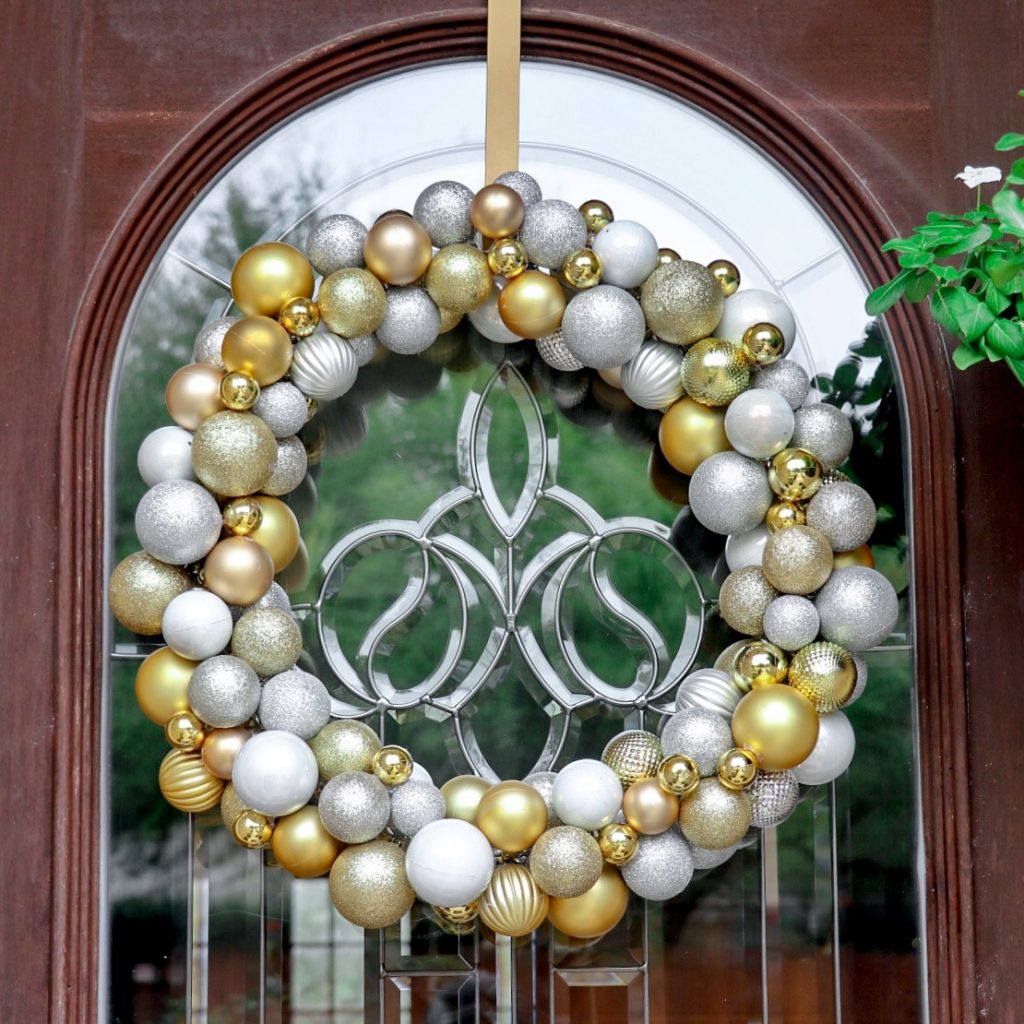
Not bad for an afternoon project, and this Dollar Tree ornament wreath didn’t cost a lot to make!
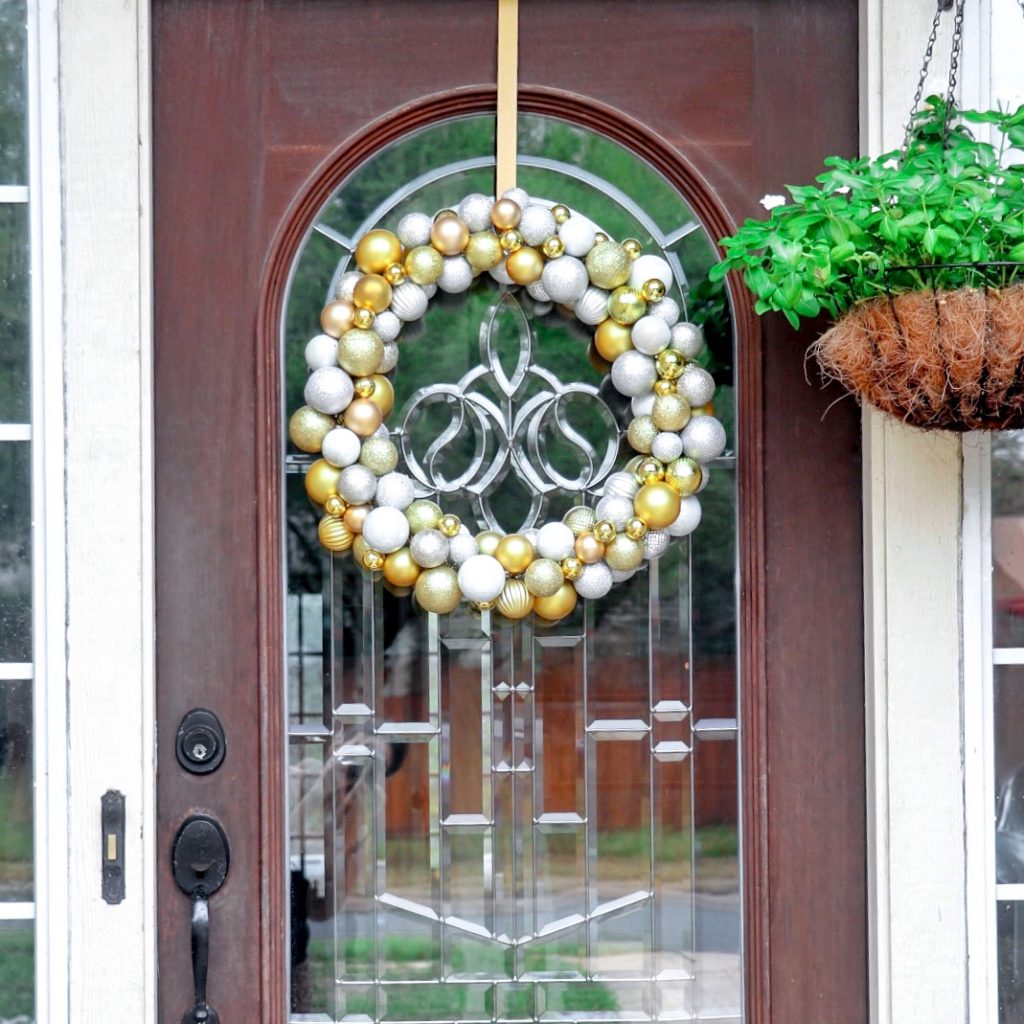
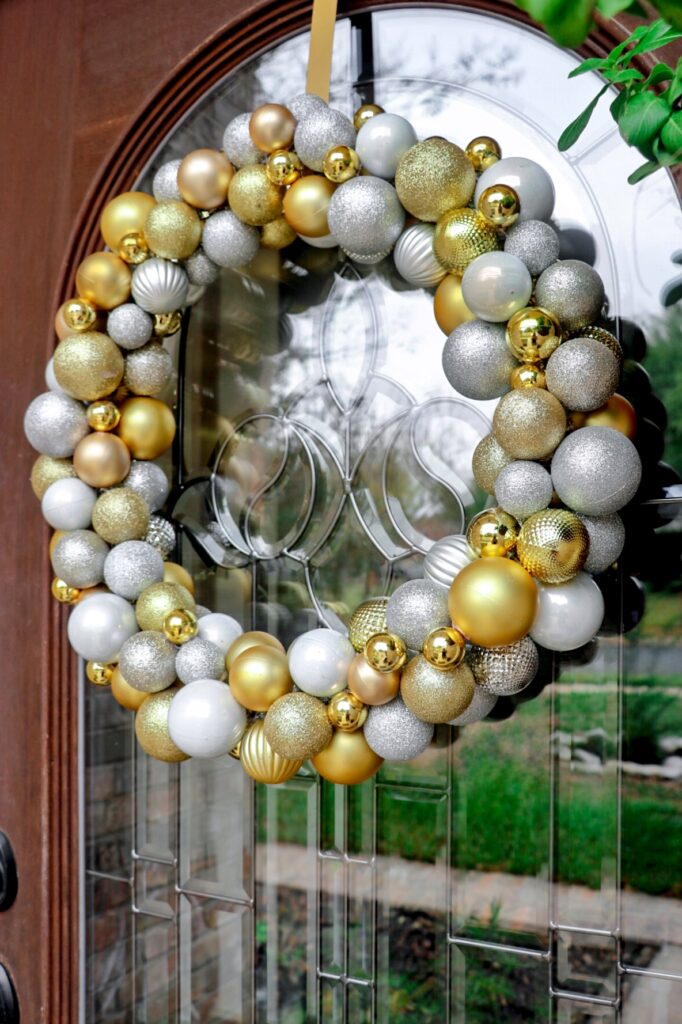
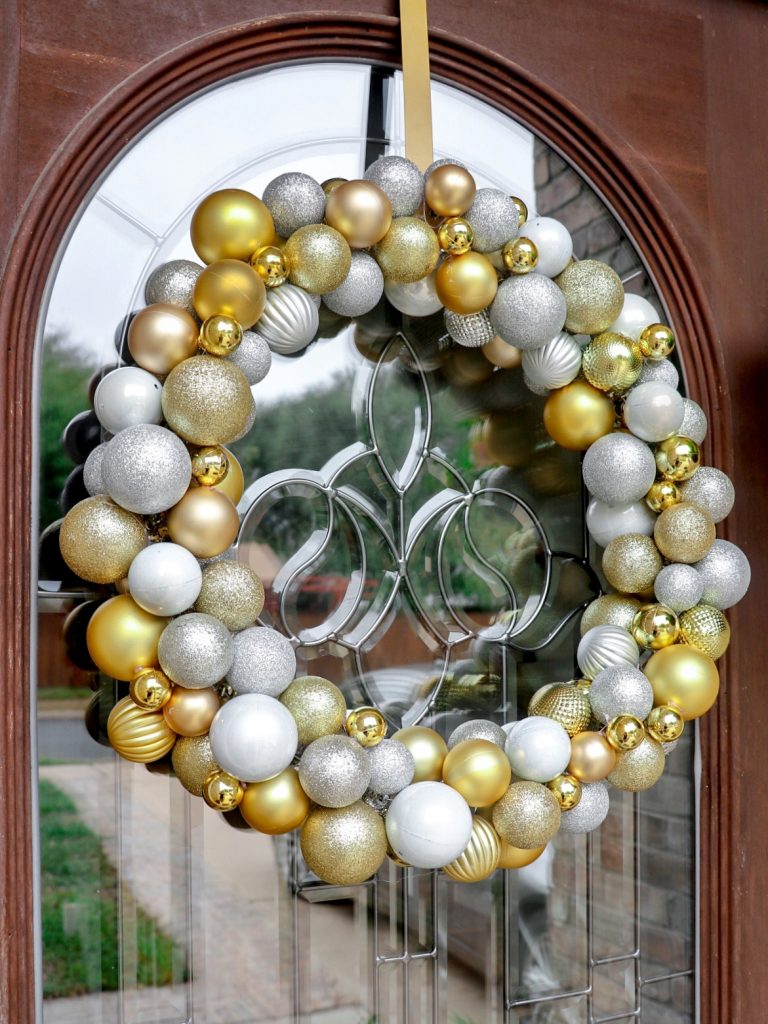
I’m really pleased with how this DIY Christmas ornament wreath came together.
That’s how to make an ornament wreath! If you gave this project a try, I’d love to see yours. Tag me on social media at @fabeveryday to show off your work!

Leave a Reply