
Confession: Over the last couple of years I’ve started hoarding mini Christmas tree decorations. I think it started when I saw my friend Hey, It’s Jenna‘s massive tree collection. I don’t think I need as many as she has, but I love the way groupings of little tree figurines look around the house. I started with bottle brush trees from the Target Dollar Spot, then I got some mod ones that I use for my contemporary Christmas mantel, and last year I added some galvanized metal trees from my grocery store (of all places) and glittery gold ones from the craft store. I remembered seeing some really pretty beaded trees at the Nutcracker Market last year and thought that they might be a pretty easy DIY. I finally got around to it this year, and am happy to report that it was easy! Today I’m sharing my instructions for DIY beaded Christmas trees. In addition to metallic beaded garlands, bulk Mardi Gras beads are great for making a beaded Christmas tree in non-Christmassy colors (I wanted some teal ones). Here’s how to make a beaded Christmas tree, including the supplies needed and the beaded Christmas tree tutorial.
Disclosure: This post contains affiliate links, which means that if you click on one of the product links and make a purchase, I may receive a commission. This does not cost you anything additional, and helps me to keep the rest of my content free, so thank you!
What you need to follow this beaded Christmas tree tutorial
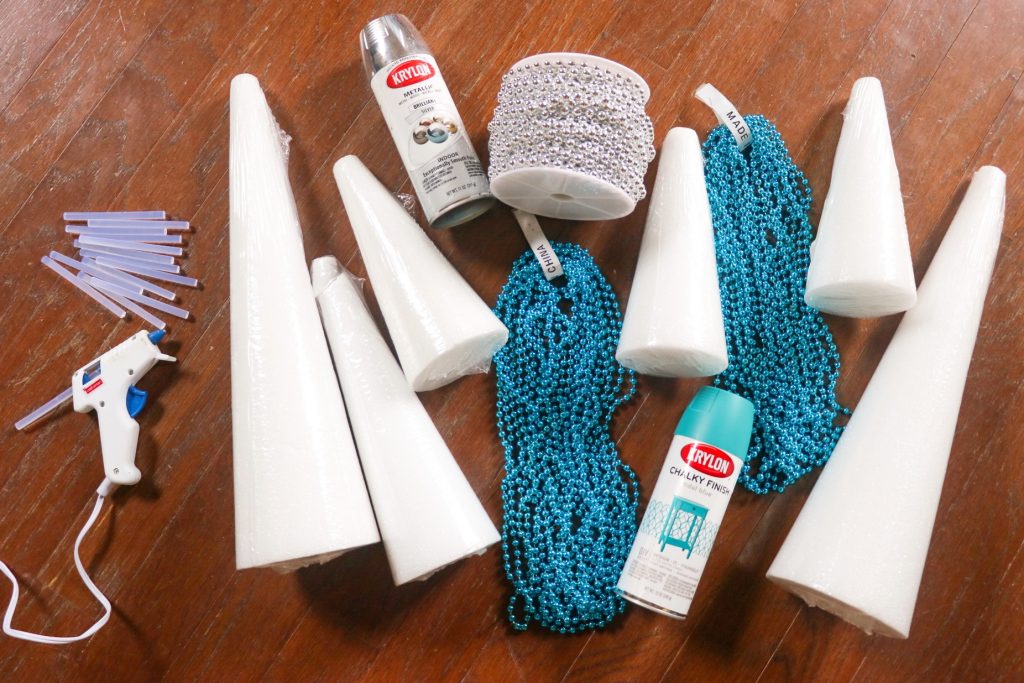
- Craft foam cone trees in various sizes (I got mine at the craft store, but you can find a variety of shapes and sizes on Amazon)
- Beaded garland or Mardi Gras beads in your choice of colors. Note: you will need more beads than you might think. I used almost two full 98′ rolls of silver garland to make the 4 silver trees and nearly 2 dozen Mardi Gras beads to make the 2 teal trees.
- Spray paint that matches the color(s) of the beads
- Hot glue gun and glue sticks
How to make a beaded Christmas tree

- The first step in making your beaded cone Christmas tree is to decide which cones will be which colors (if using more than one color). Then, spray paint the cones with the coordinating spray paint for your beads. Since the beads are rounded, there will be gaps where you will see the cone behind the layer of beads, and spray painting the cones first will help them to look a lot better than if there was white foam peeking through.
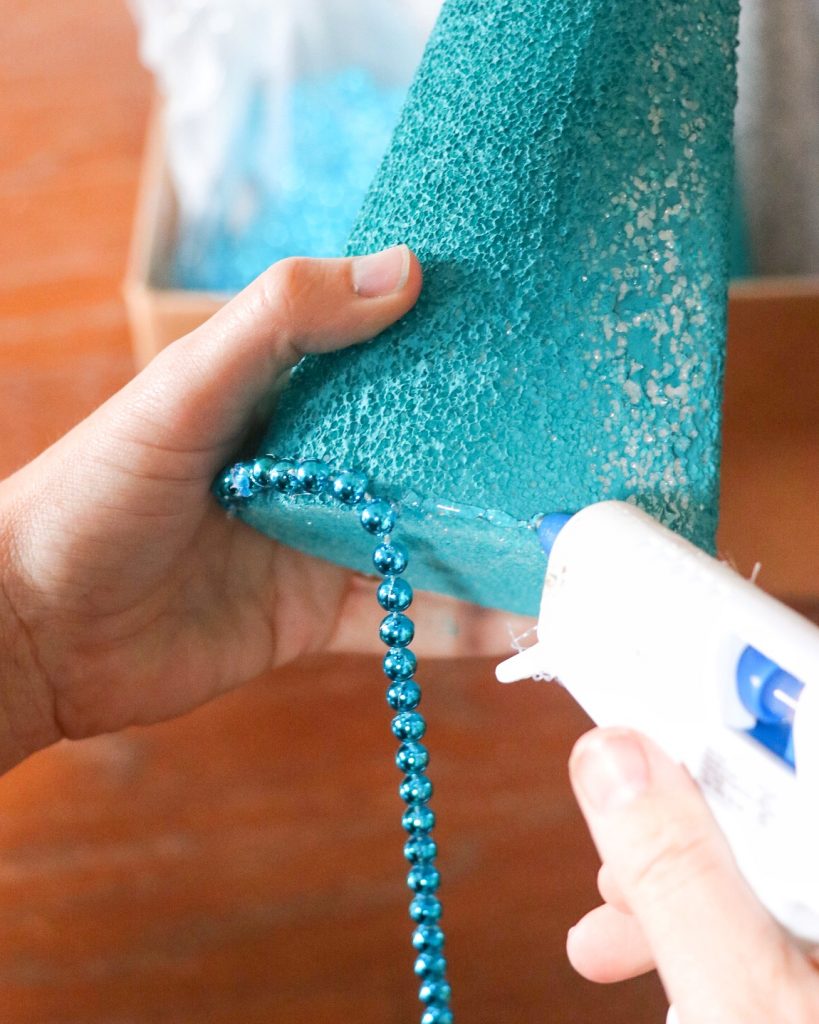
- After the spray paint has dried, you can start applying the beads to your DIY beaded Christmas tree. To do this, start at the bottom of the tree and add a line of hot glue.

- Press the strand of beads (whether you’re using a garland or Mardi Gras beads) onto the hot glue. Press the beads together so they sit tightly next to one another as you go to avoid gaps from the strings between beads. Keep using the same continuous strand for ease as you wrap around the tree.
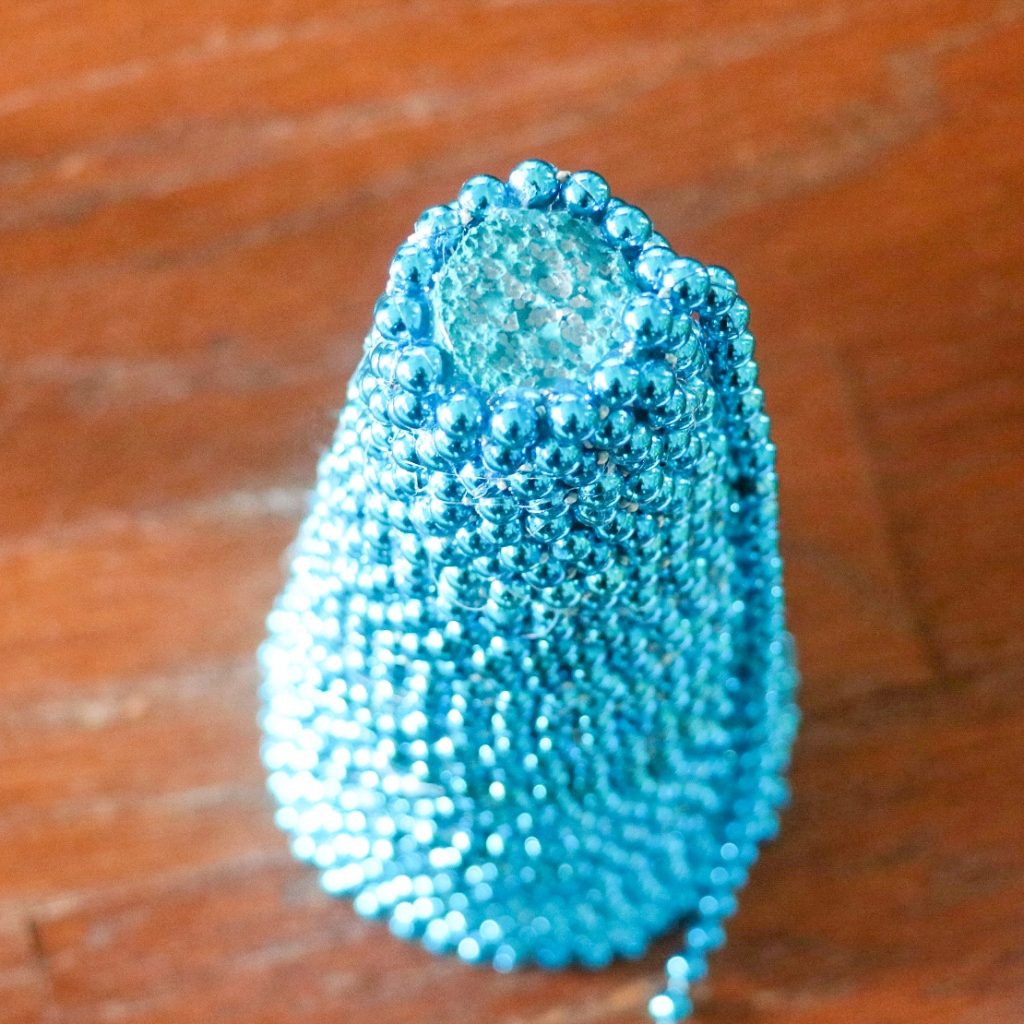
- Continue gluing and wrapping the beads around the cone until you reach the top. If you are using cones that have a flat tip (like the ones I used) instead of a pointed tip, you can either have your tree top be flat as well, or you can build a little cone tip of your own on your DIY beaded Christmas tree.
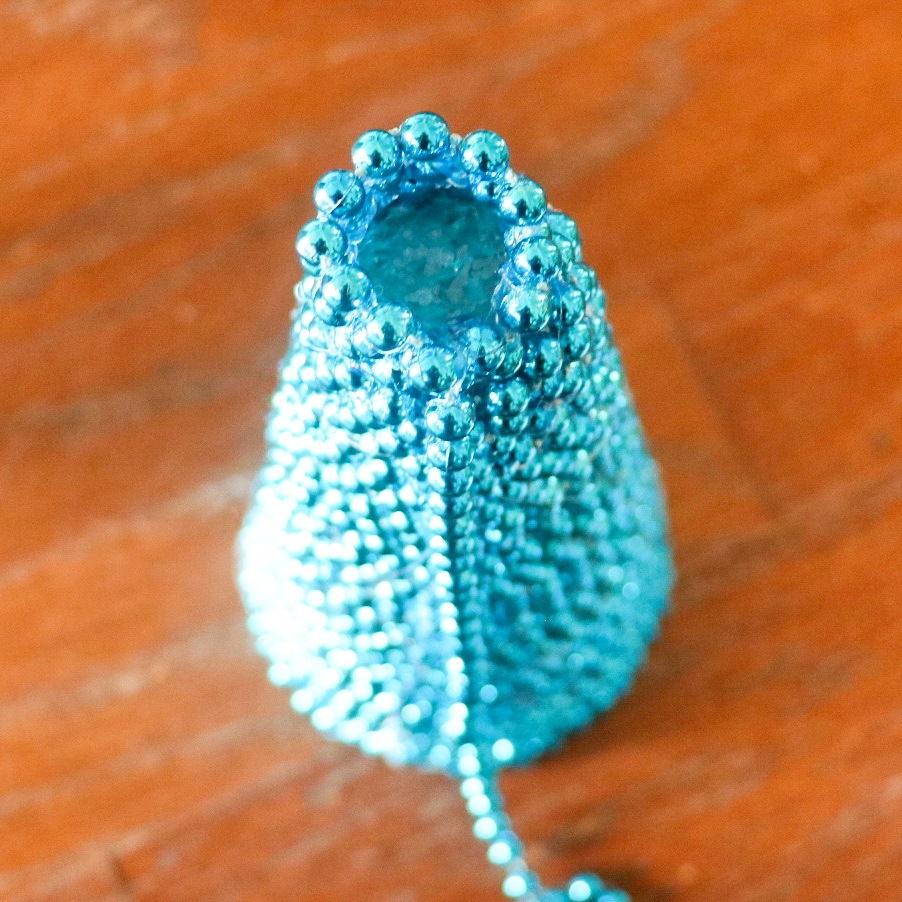
To build the cone tip, I stacked rows of beads on top of each each other from the same continuous strand, securing with hot glue in between the layers. This created a hollow cone secured by hot glue.
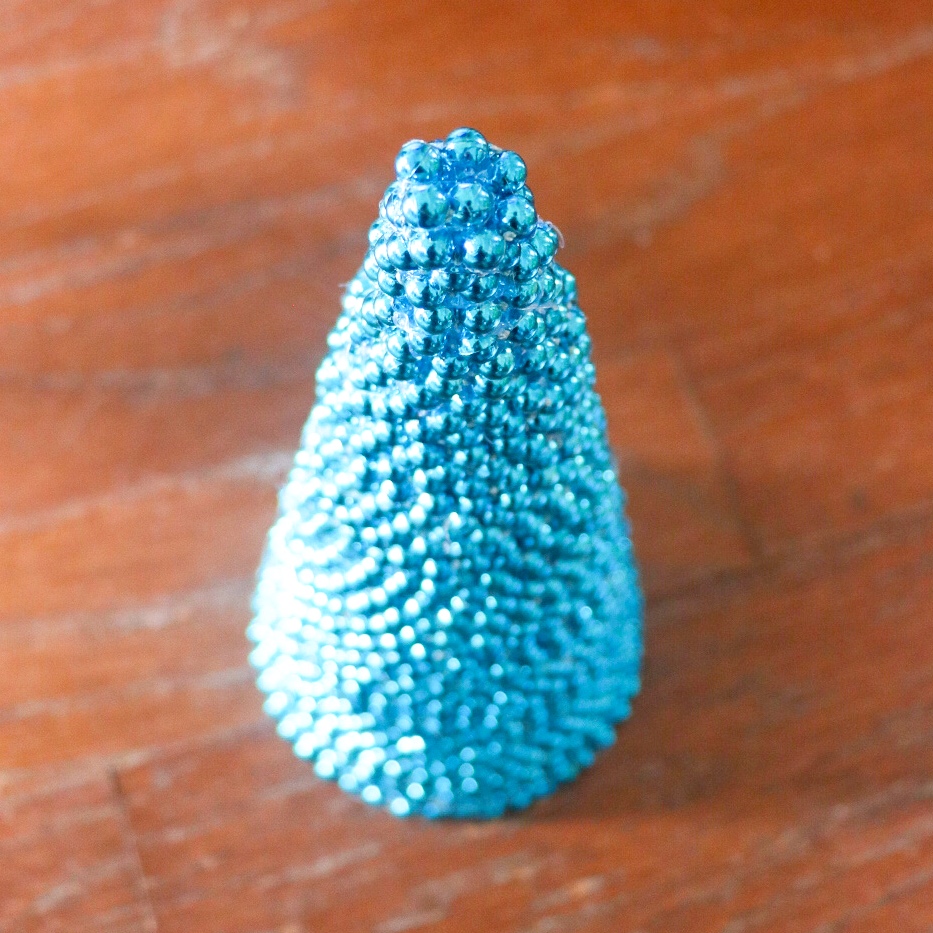
The tip isn’t perfect, but it works!

Display your trees in groupings of different sizes and colors. Can you spot the one Sawyer helped me make? He had fun doing it, but didn’t have the patience to press the beads together to eliminate gaps between them. The fun is really what it’s all about anyway!


Now you know how to make a beaded Christmas tree! I hope you found this beaded Christmas tree tutorial helpful. Tag me on social media at @fabeveryday to show off your own DIY beaded Christmas decorations!

Leave a Reply