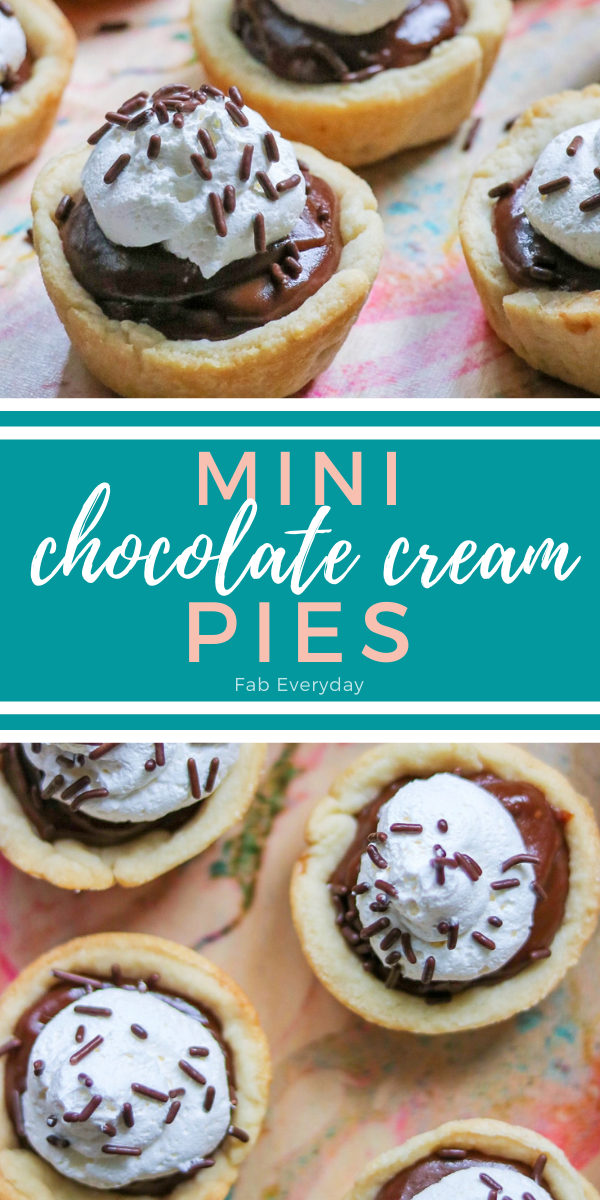
Family recipes are the best, and I am honored that my Aunt Clarica has entrusted me with her incredible chocolate pie recipe. With her permission, I adapted Aunt Clarica’s family-favorite chocolate cream pie into mini individual chocolate pies for the recipe I am sharing today. These mini chocolate pies are so delicious, and perfect for parties. They are super crave-worthy, so don’t be surprised if you are requested to make this mini chocolate pie recipe again and again. I’m sharing the easy mini chocolate pudding pies recipe at the end of this post (feel free to scroll if you’re ready to get cooking), but first I’m sharing some step-by-step photos and cooking tips. Oh, and if you like these, you’ll also love my Mini Coconut Cream Pie recipe, so be sure to save that one, too!
How to make crust for the mini chocolate pies
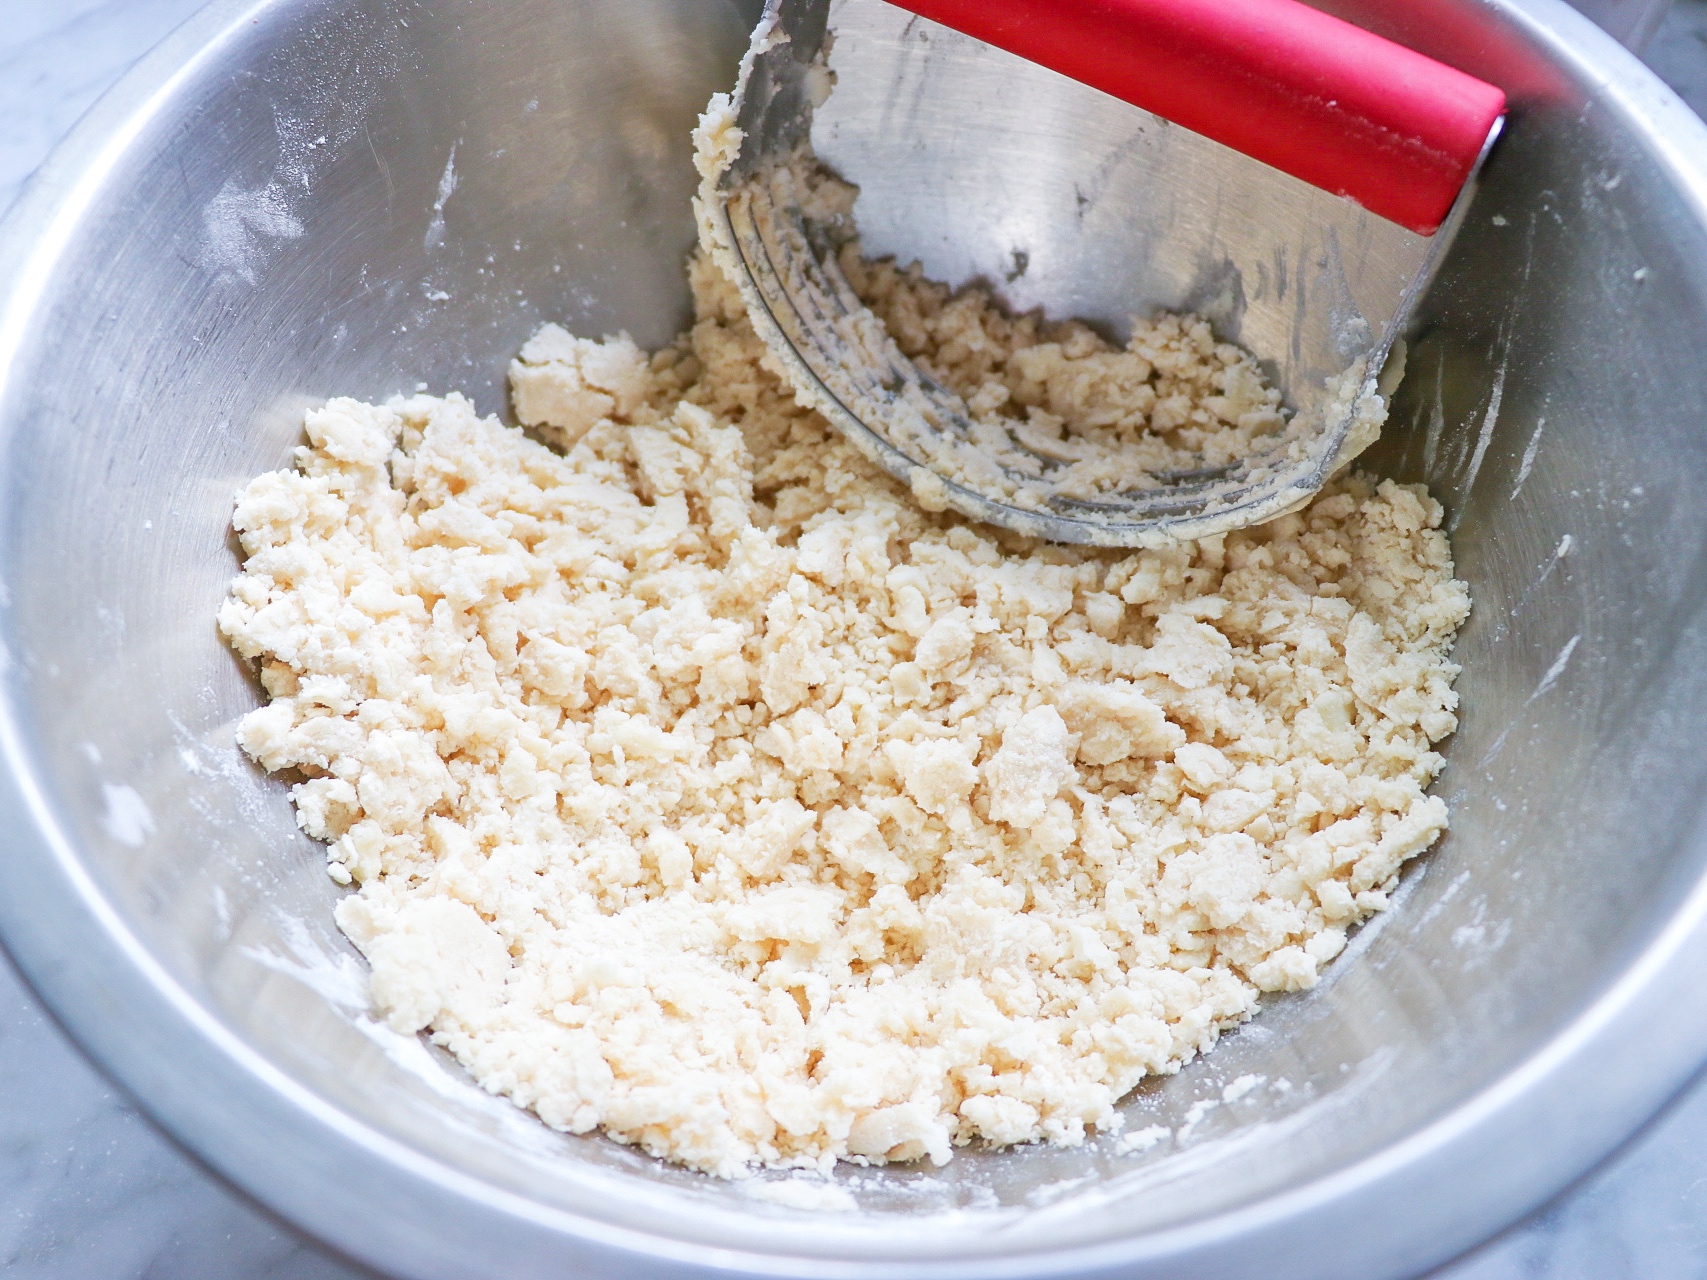
This mini chocolate cream pies recipe begins with preparing and pre-baking the mini pie crusts. When making mini pies in muffin pans, you need about twice the amount of dough that you would use for a regular, single-crust cream pie. Start by sifting 2 cups of the flour and salt together into a large mixing bowl. Thoroughly cut in Crisco shortening with a fork or pastry cutter.
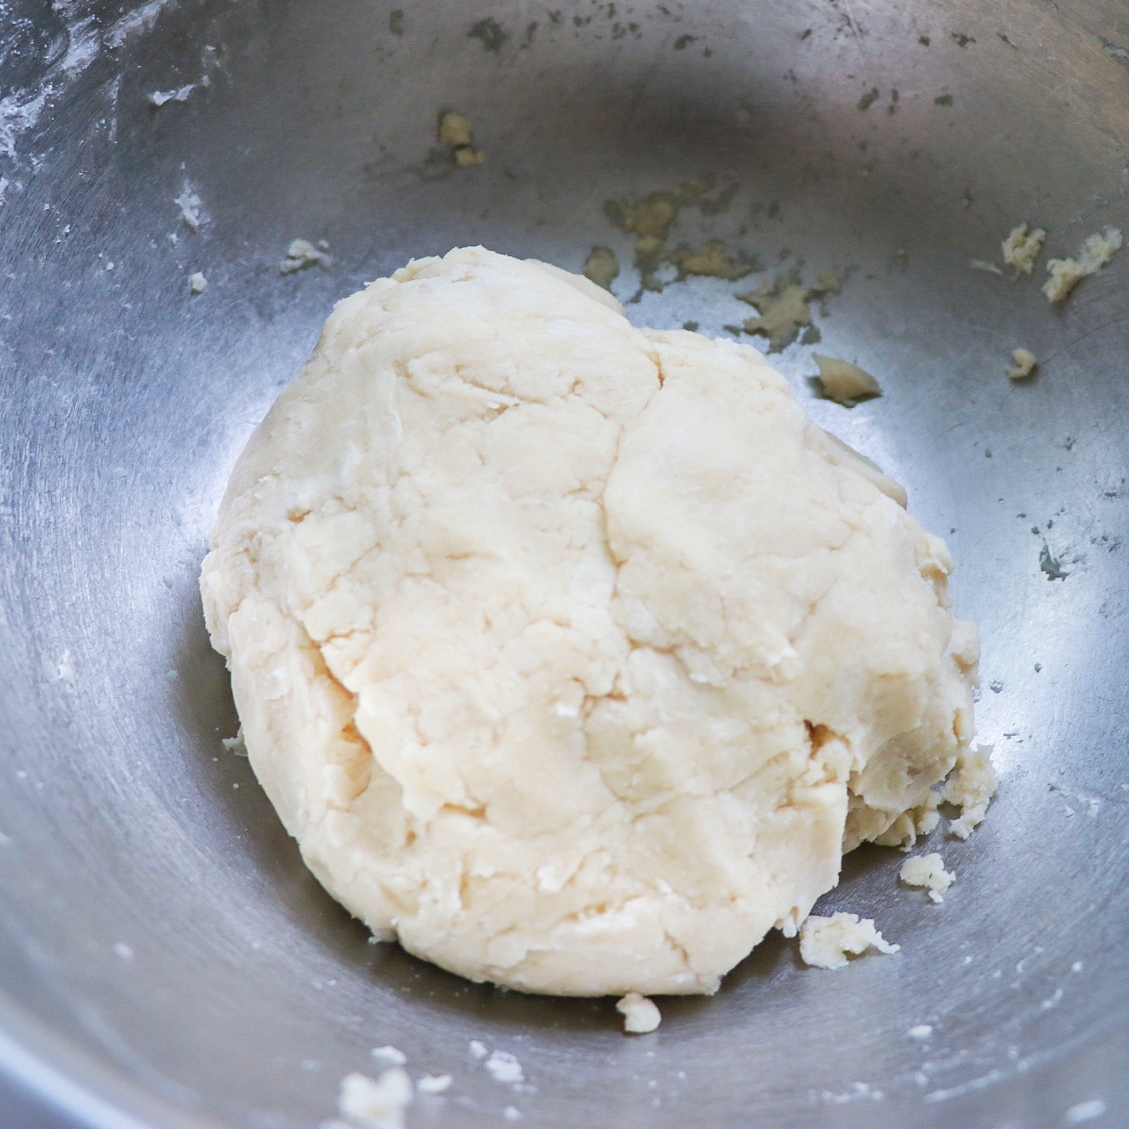
Stir in 4 tablespoons of ice cold water. Add up to a tablespoon more water if the dough seems too dry. Gather the dough into a ball.
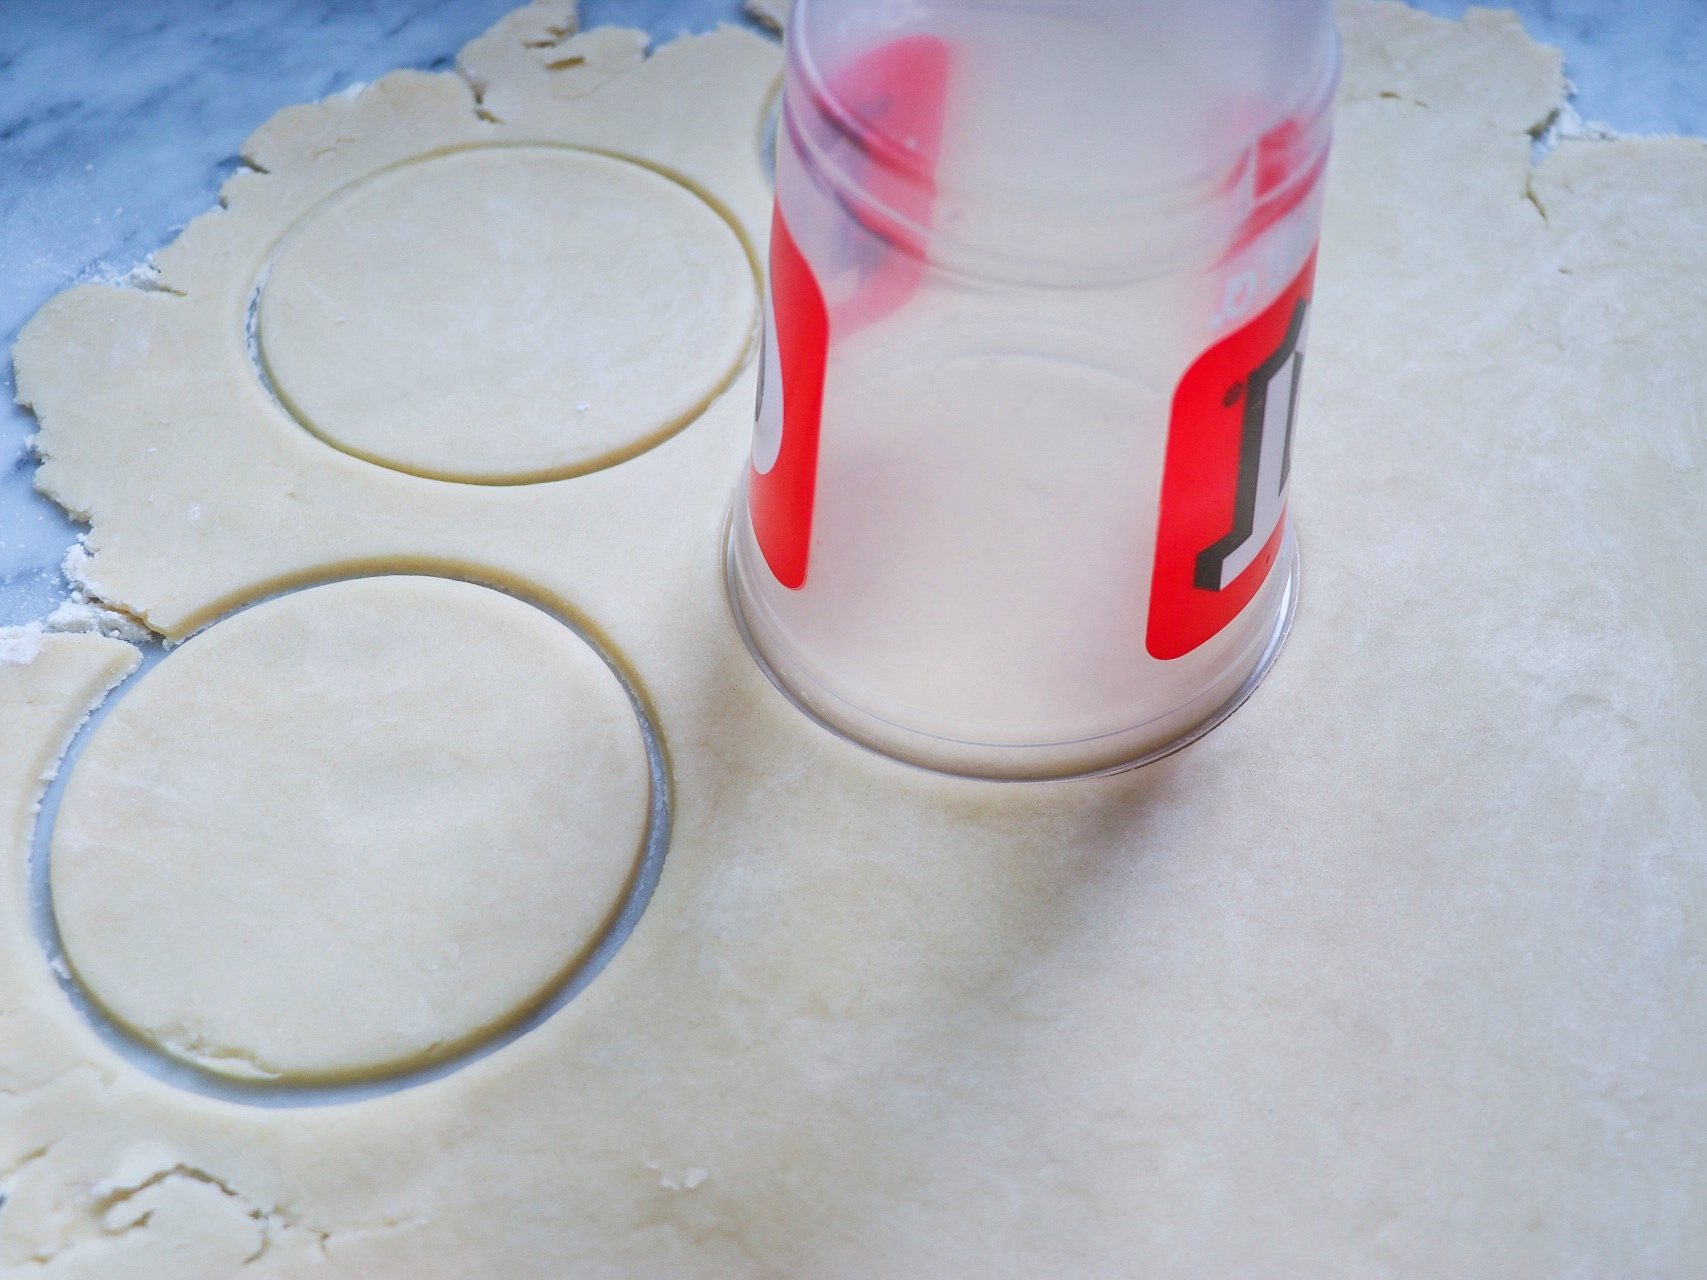
Roll the individual chocolate pies’ dough out onto a floured surface. You should roll it slightly thinner than you would for a full-size pie crust. Cut 12 circles into the dough with a 4″ circle cookie cutter. You might need to re-ball then roll out the dough one or two more times to get 12 circles.
Tip: If you don’t have a 4″ circle cookie cutter, use the top of a large plastic cup. This QT Mart cup that we had in our pantry was the perfect size.
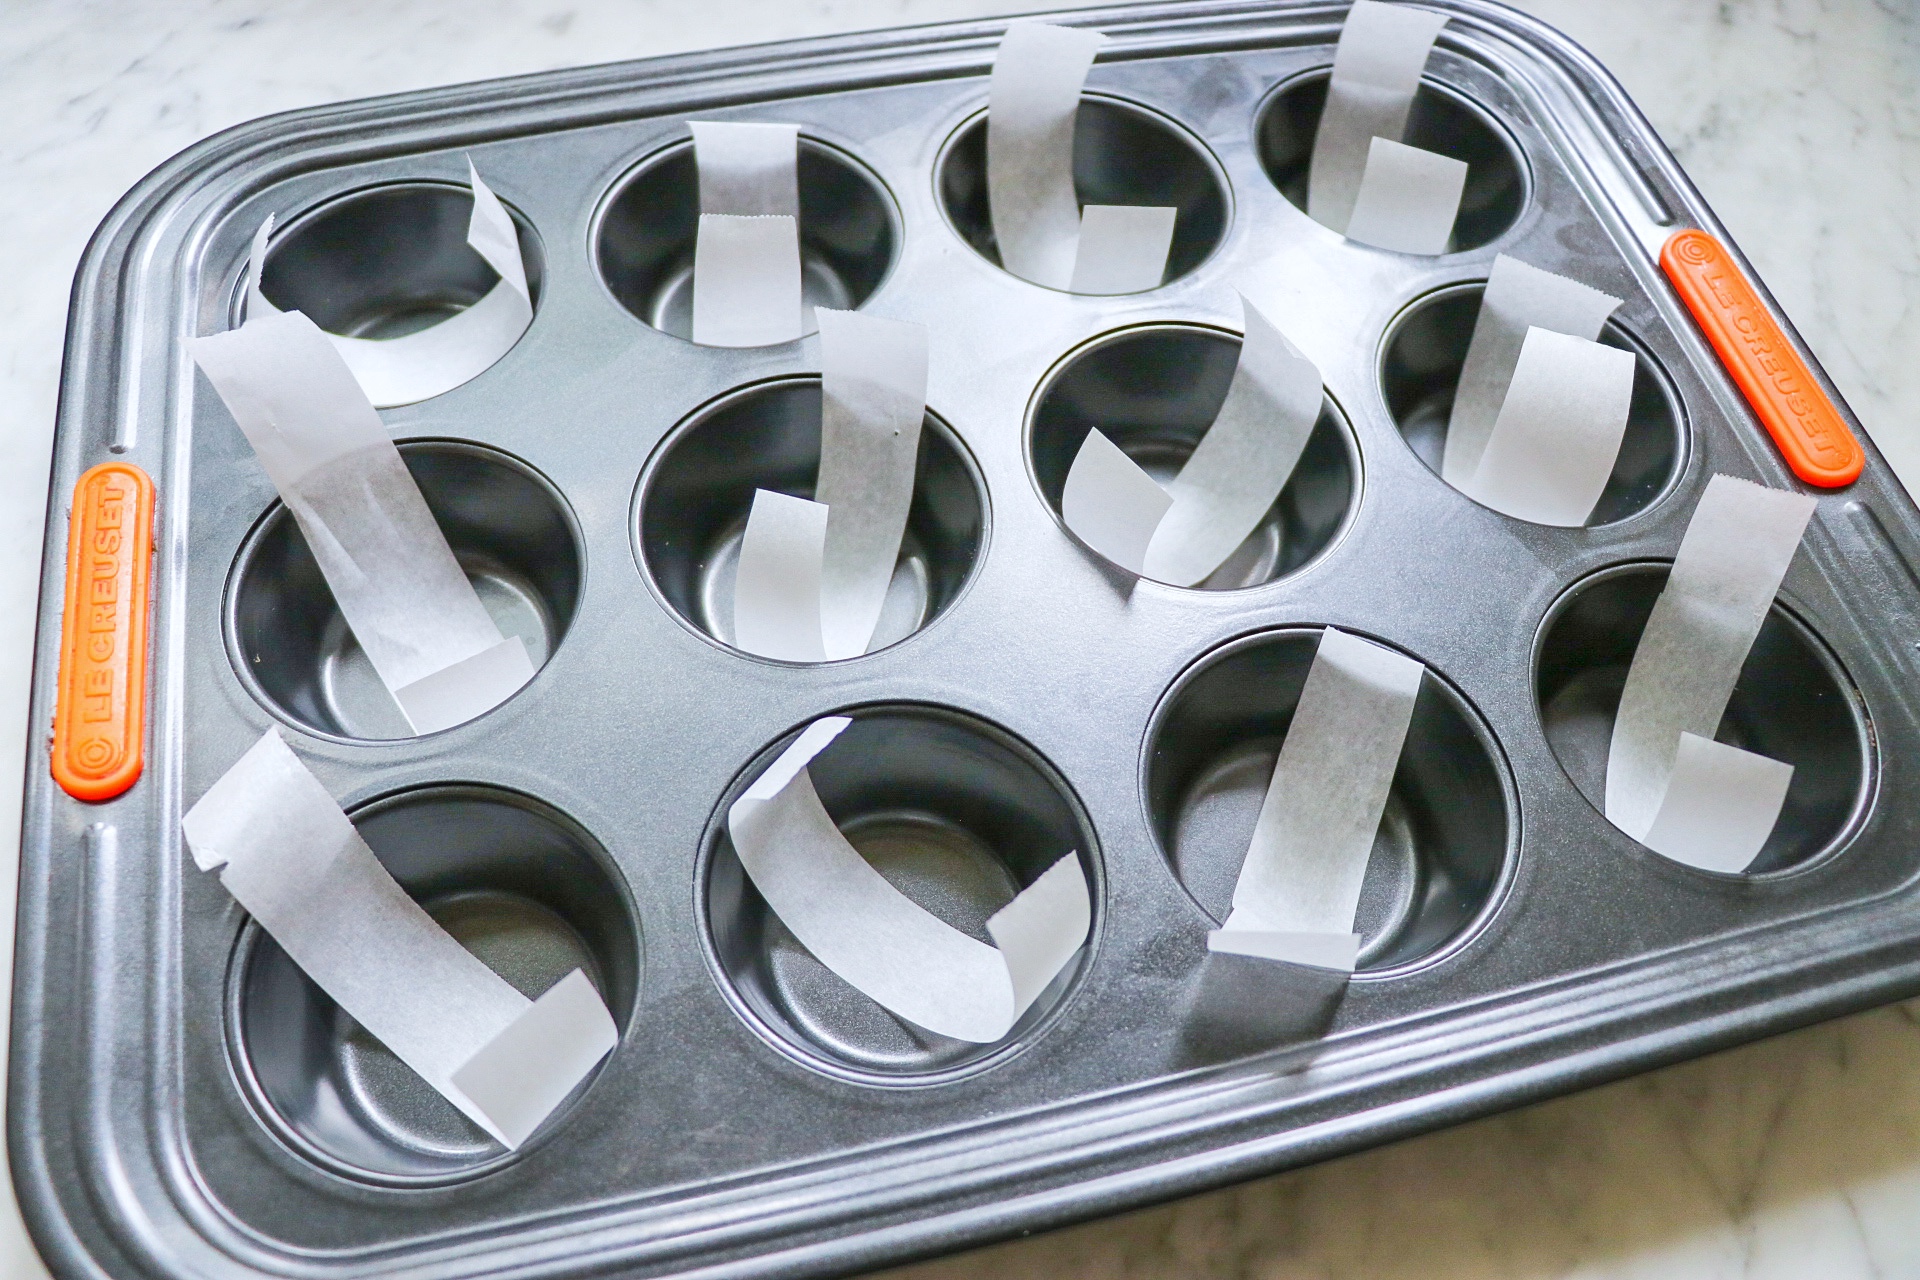
You’re going to make your mini chocolate pies in a 12-cup muffin pan. My pan has a great non-stick surface, but I have a trick for easily removing mini pie crusts from muffin tins. It’s not necessary, but it is helpful for flaky crusts like this. Cut little strips of parchment paper and lay them into the muffin cups before pressing your dough circles into the cups.

Press the dough circles into the cups of a 12-cup muffin tin.
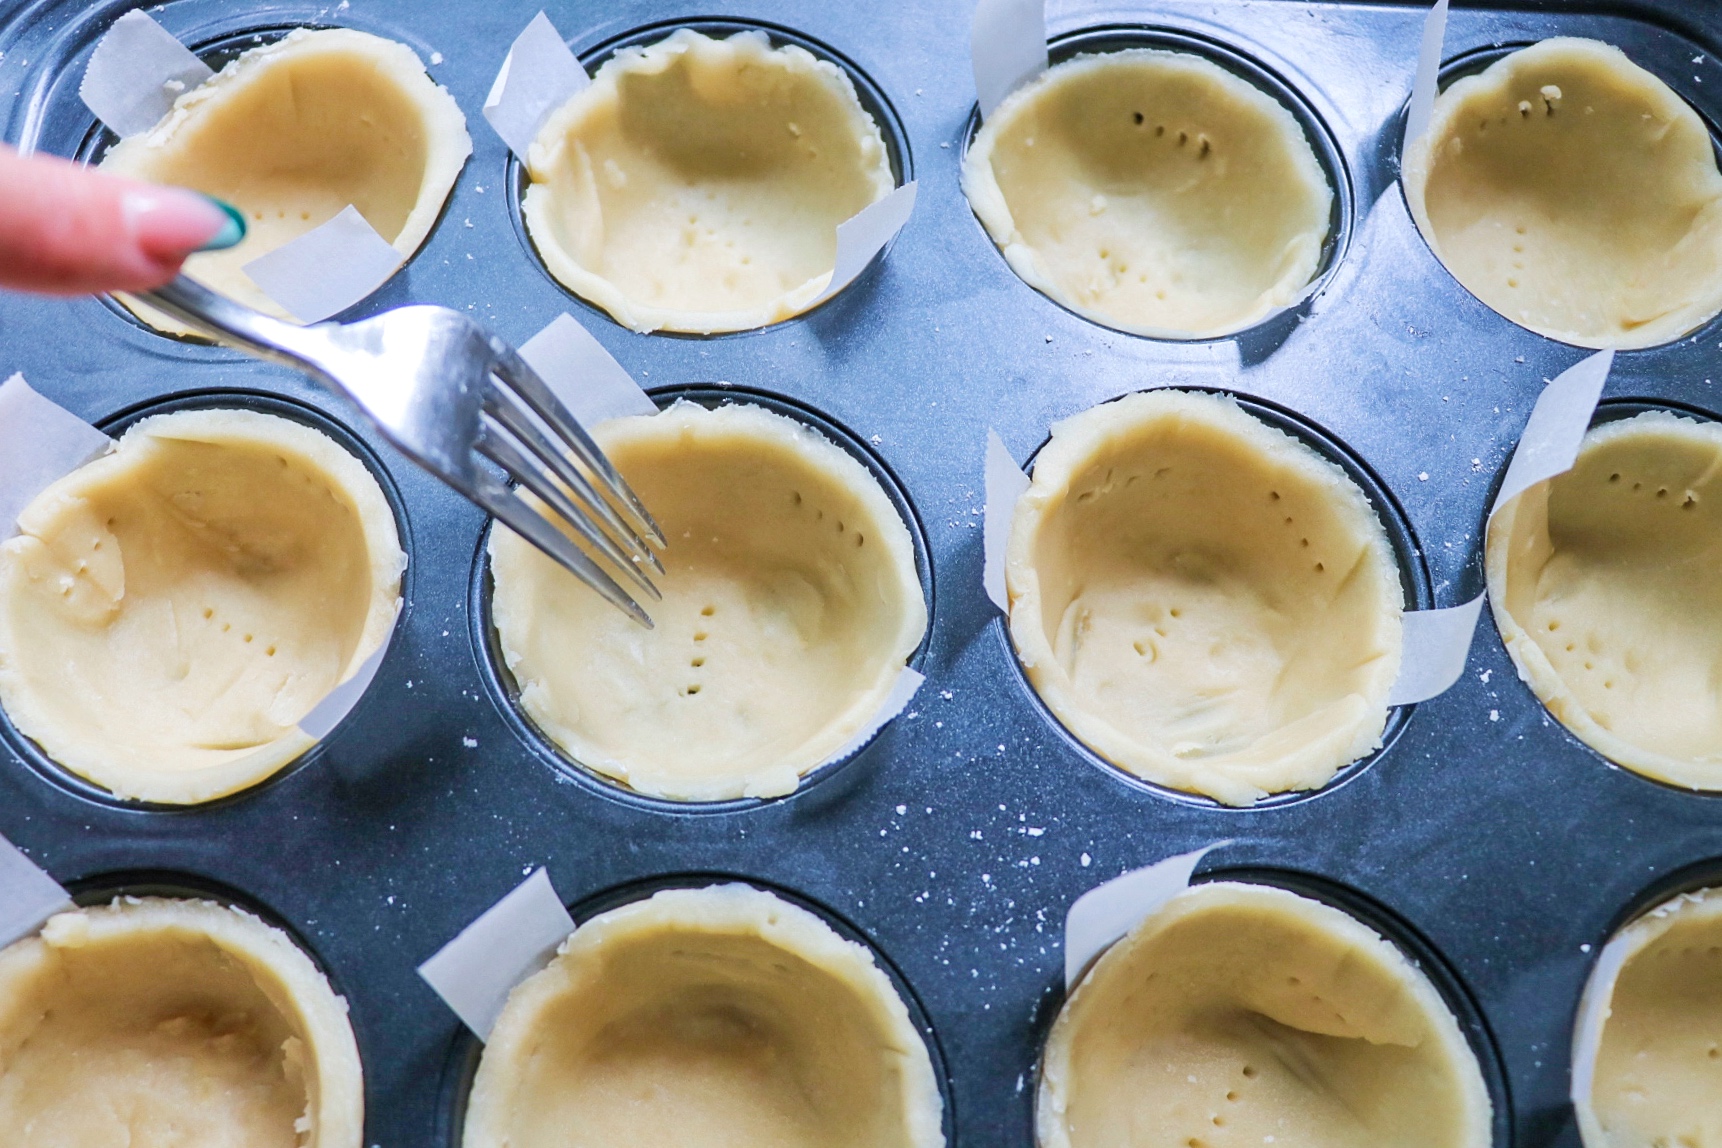
Prick the bottom and sides of the dough thoroughly with a fork.
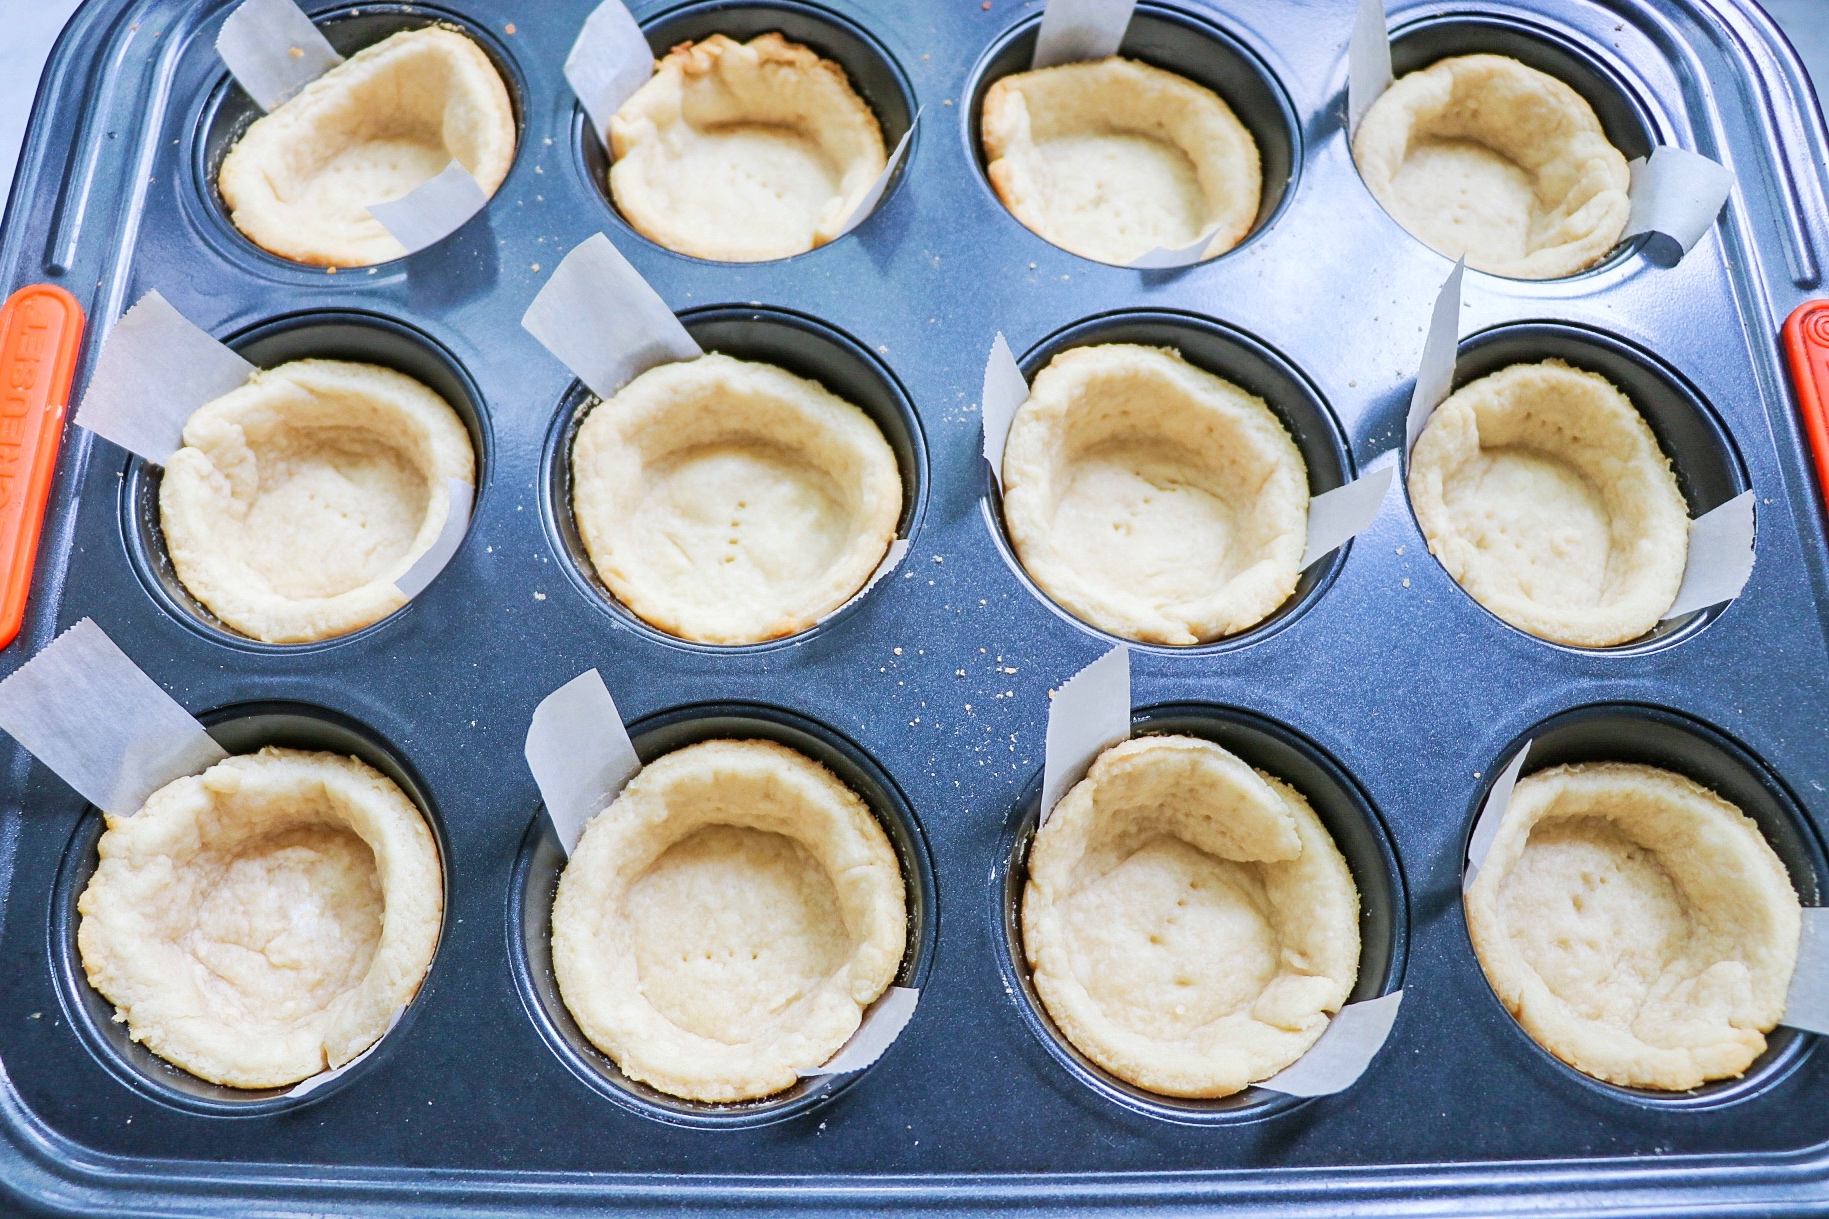
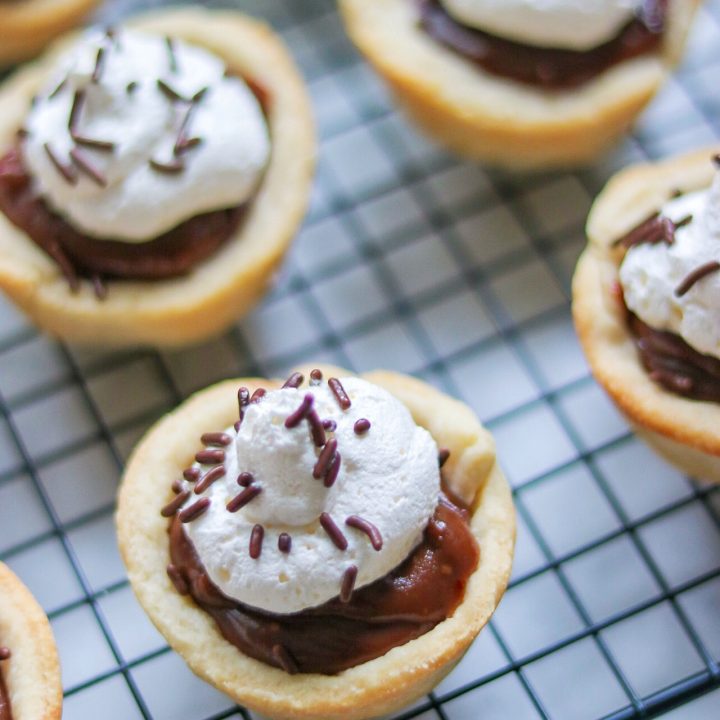
Bake the mini chocolate cream pie crusts in an oven preheated to 425 degrees F for 6-8 minutes, or until the dough is firm and lightly golden. Cool the crusts in the pan on a wire rack for 5 minutes before removing from the pan to cool on the wire rack completely.
How to make the mini chocolate cream pie filling
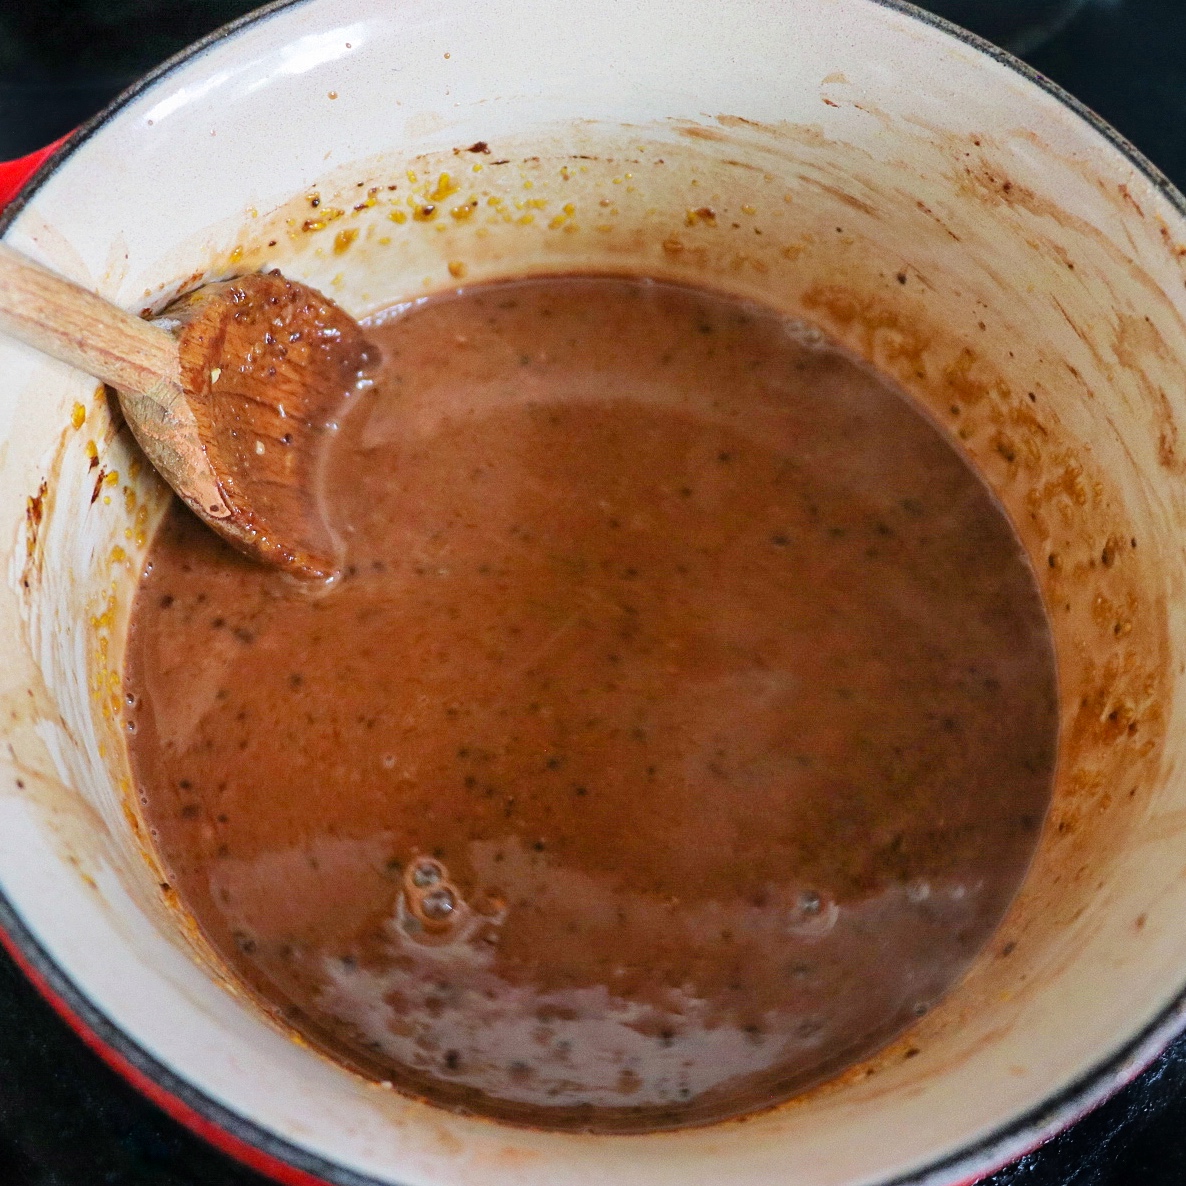
This wouldn’t be a mini chocolate cream pie recipe without some yummy chocolate filling! To make the mini chocolate pudding pies filling, place a heavy saucepan over medium heat. Add a 12-ounce can of evaporated milk, sugar, egg yolks, cocoa powder, and the remaining 2 tablespoons of flour to the saucepan and mix. Cook, stirring, until the mixture has thickened (this will take about 12 minutes). Add margarine and vanilla extract and stir until the margarine has melted and is thoroughly blended into the mixture. Remove the saucepan from heat.
Transfer the chocolate filling to a large liquid measuring cup and let it cool for a few minutes so it is warm but not boiling hot.
Assembling the mini chocolate pudding pies
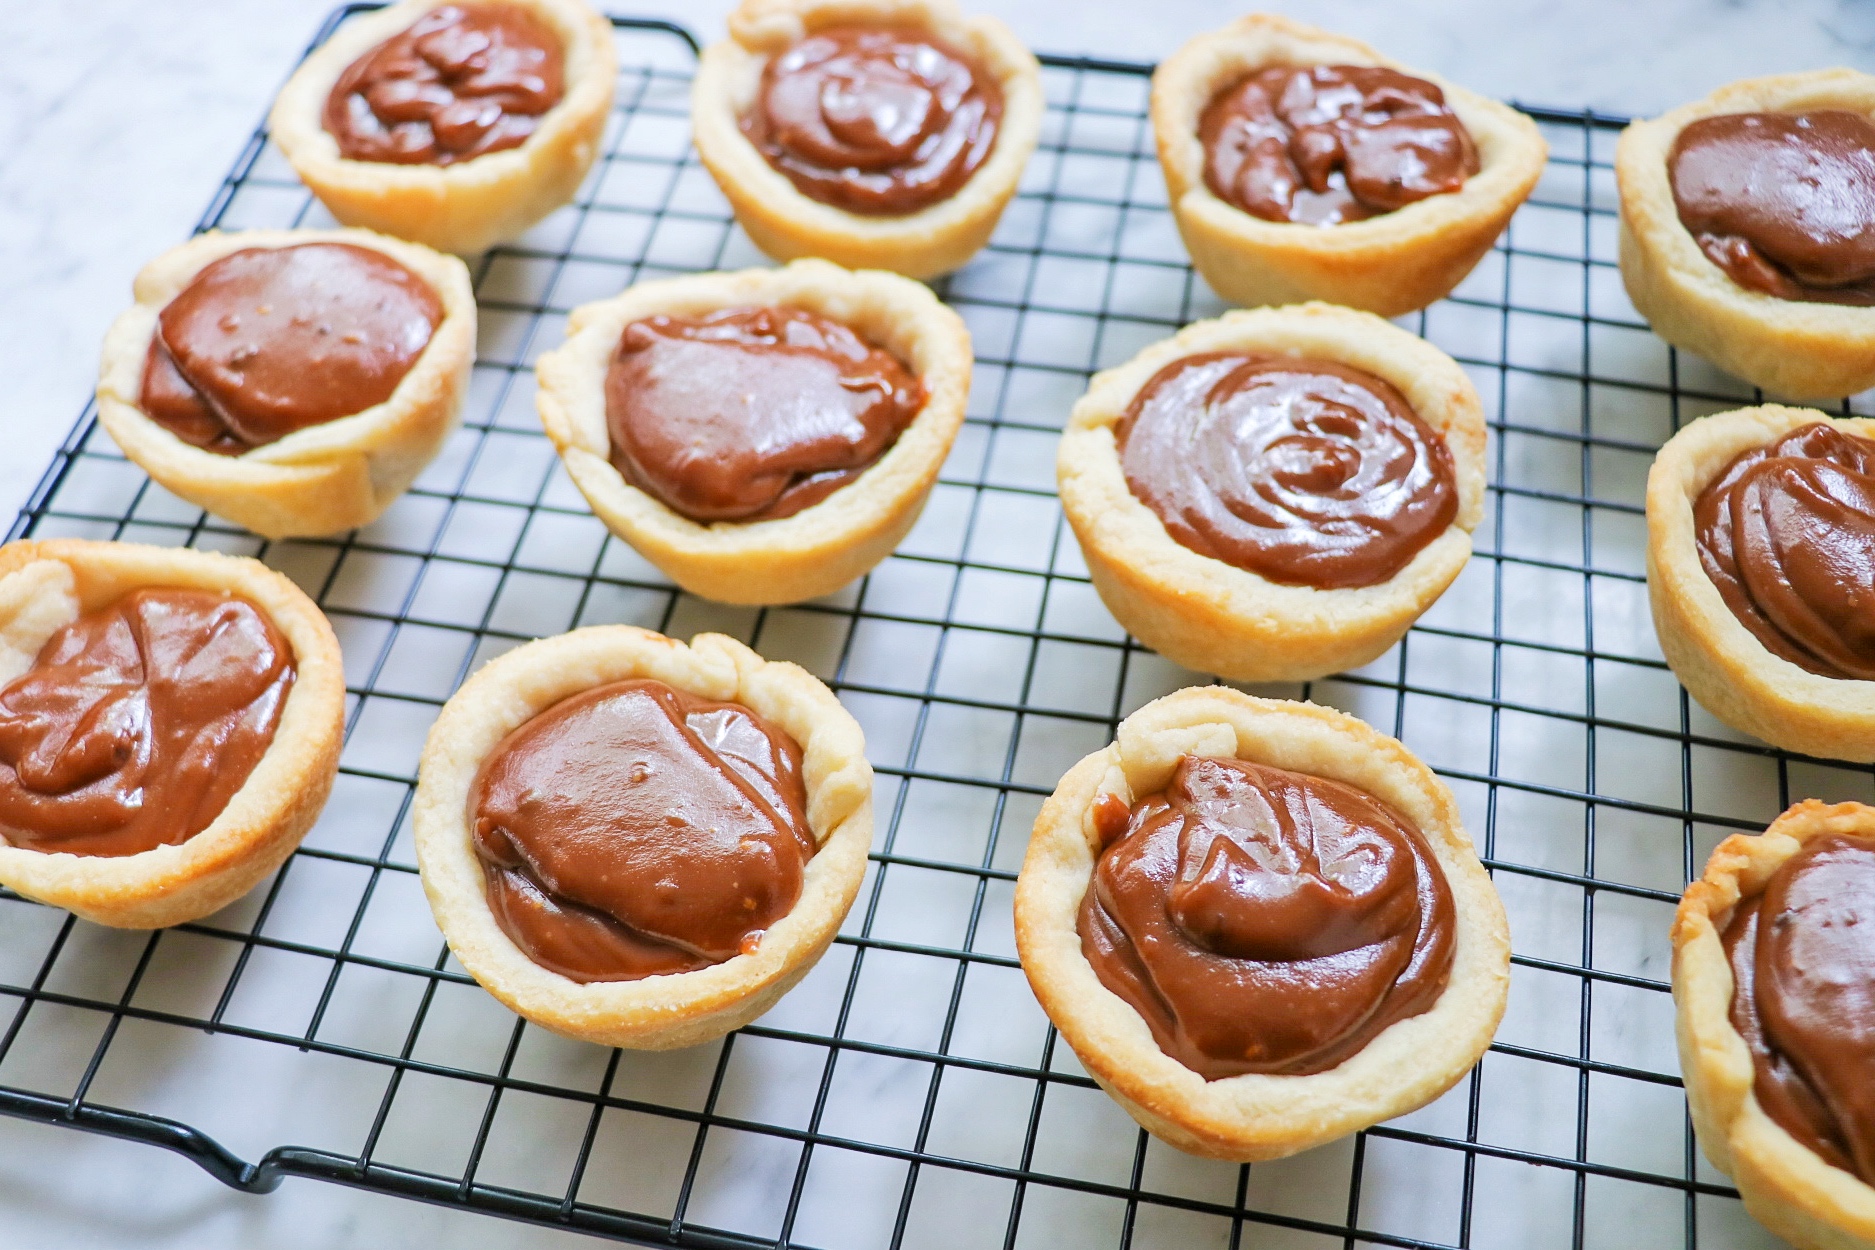
Now it’s time to put these easy mini chocolate pudding pies together! To assemble the individual chocolate pies, pour the chocolate filling into the baked pie crusts, filling the crusts as much as you can. Cool the mini chocolate pies on the counter for 30 minutes before transferring them to the refrigerator to cool for at least two more hours to finish setting.
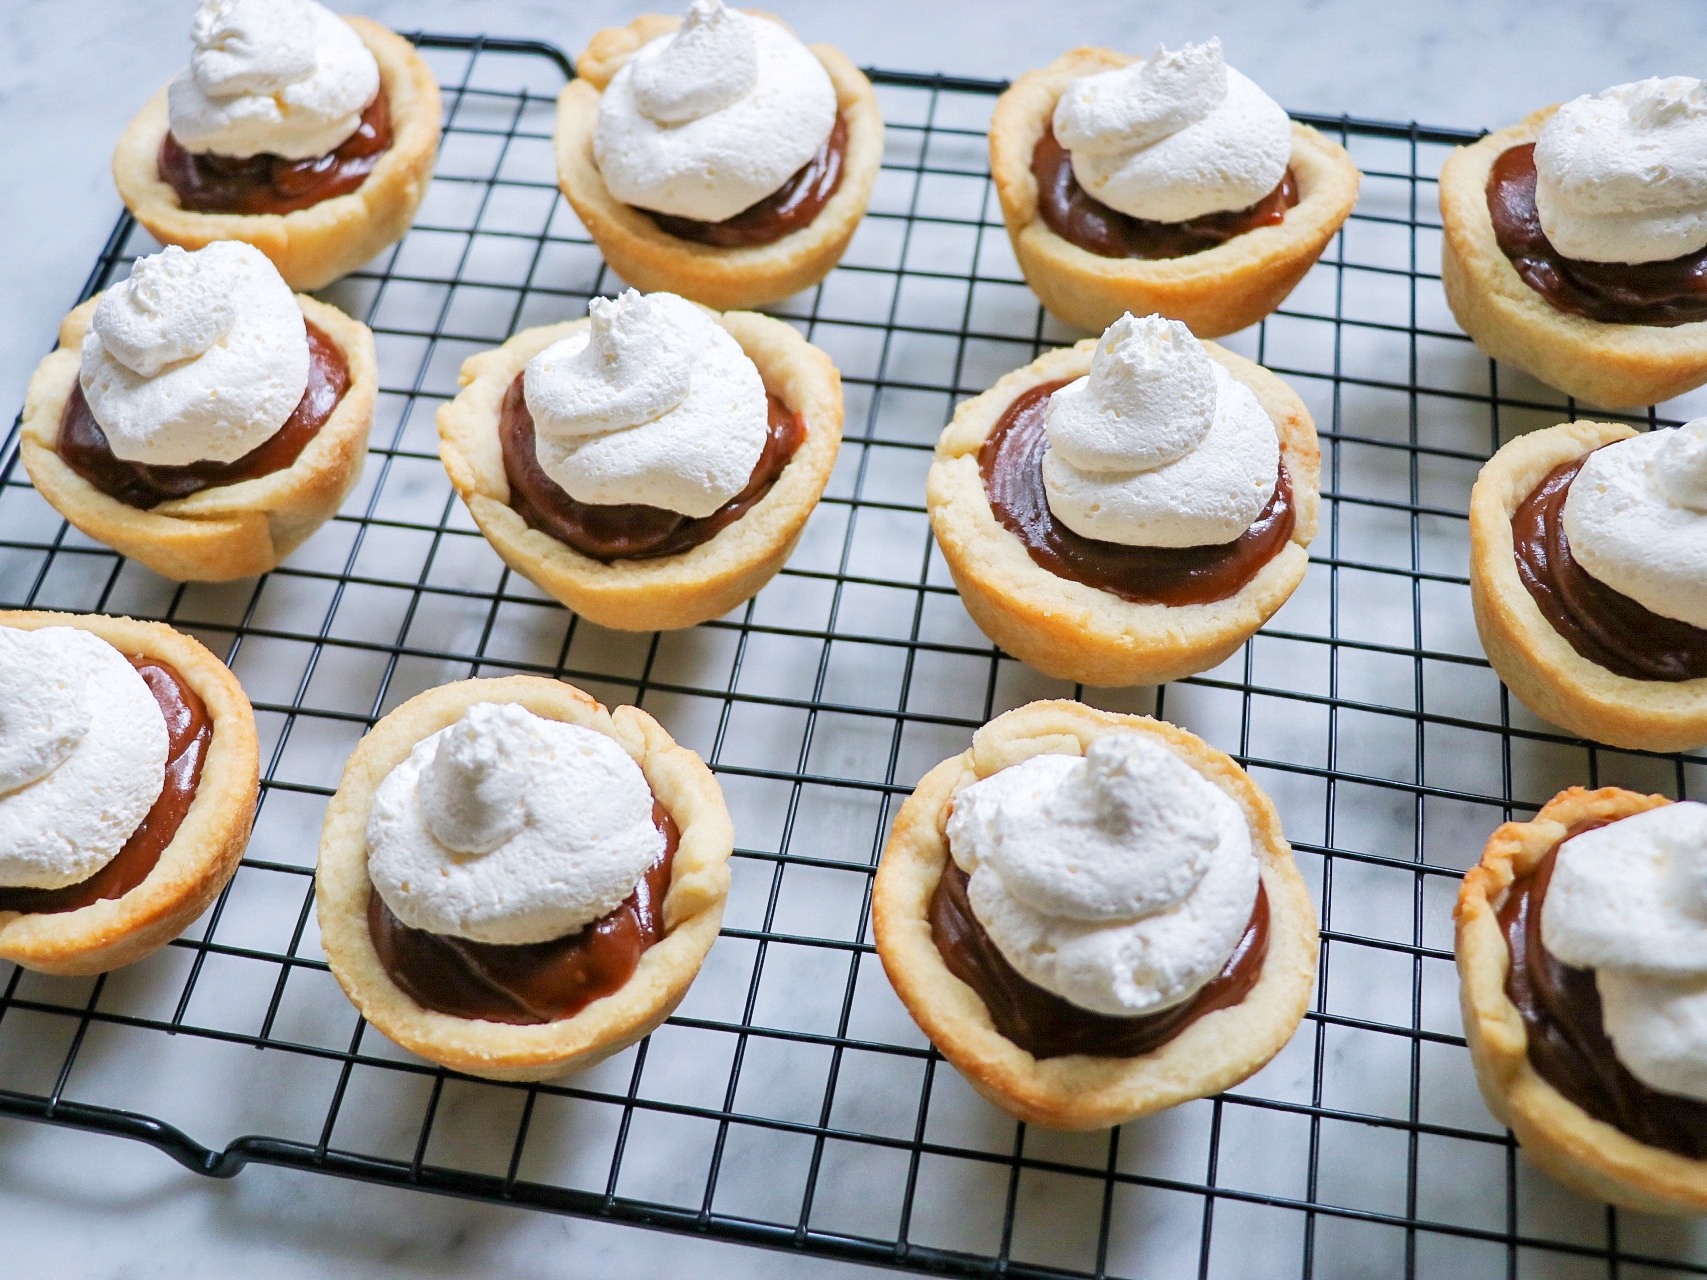
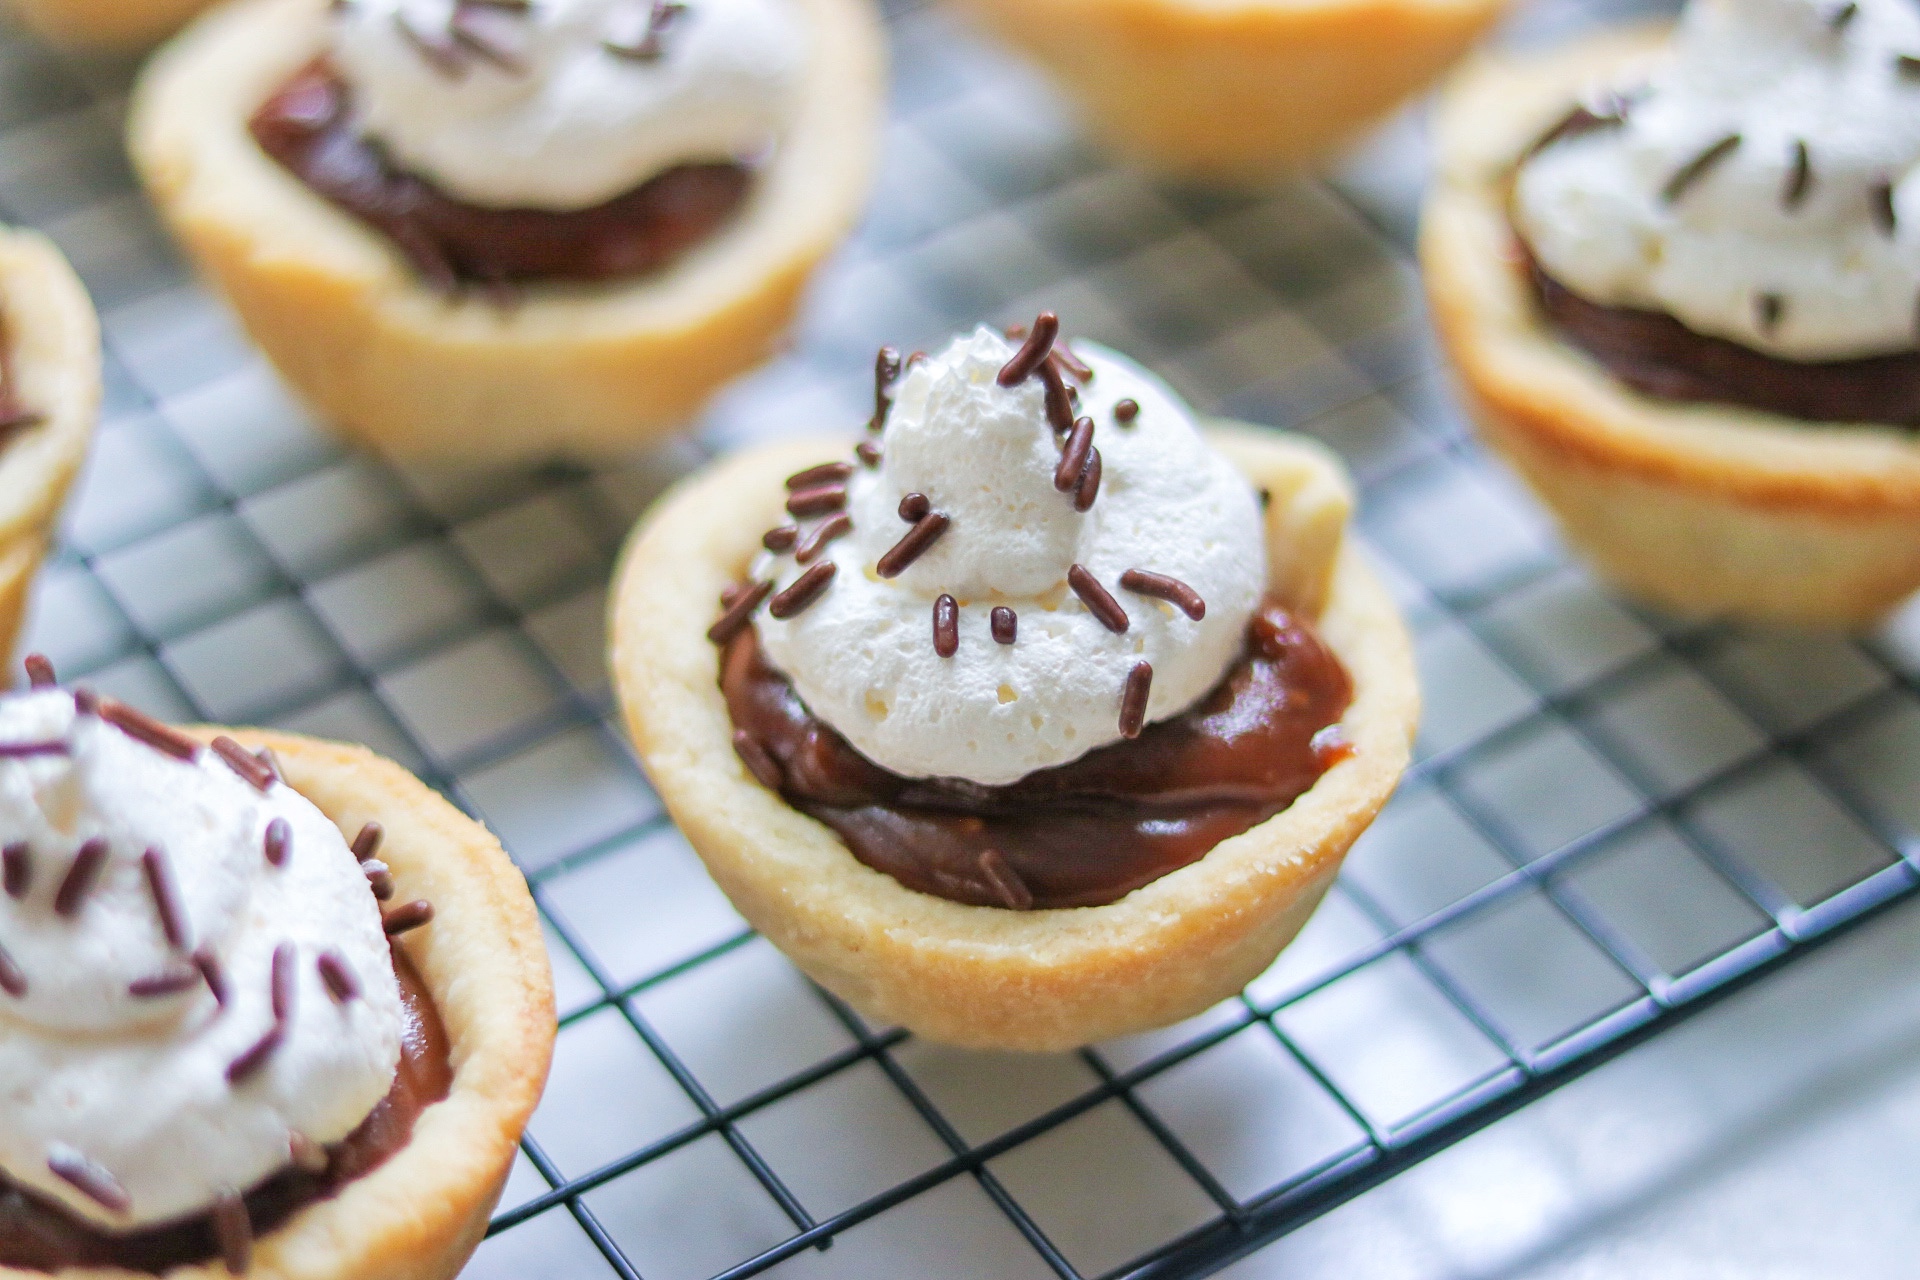
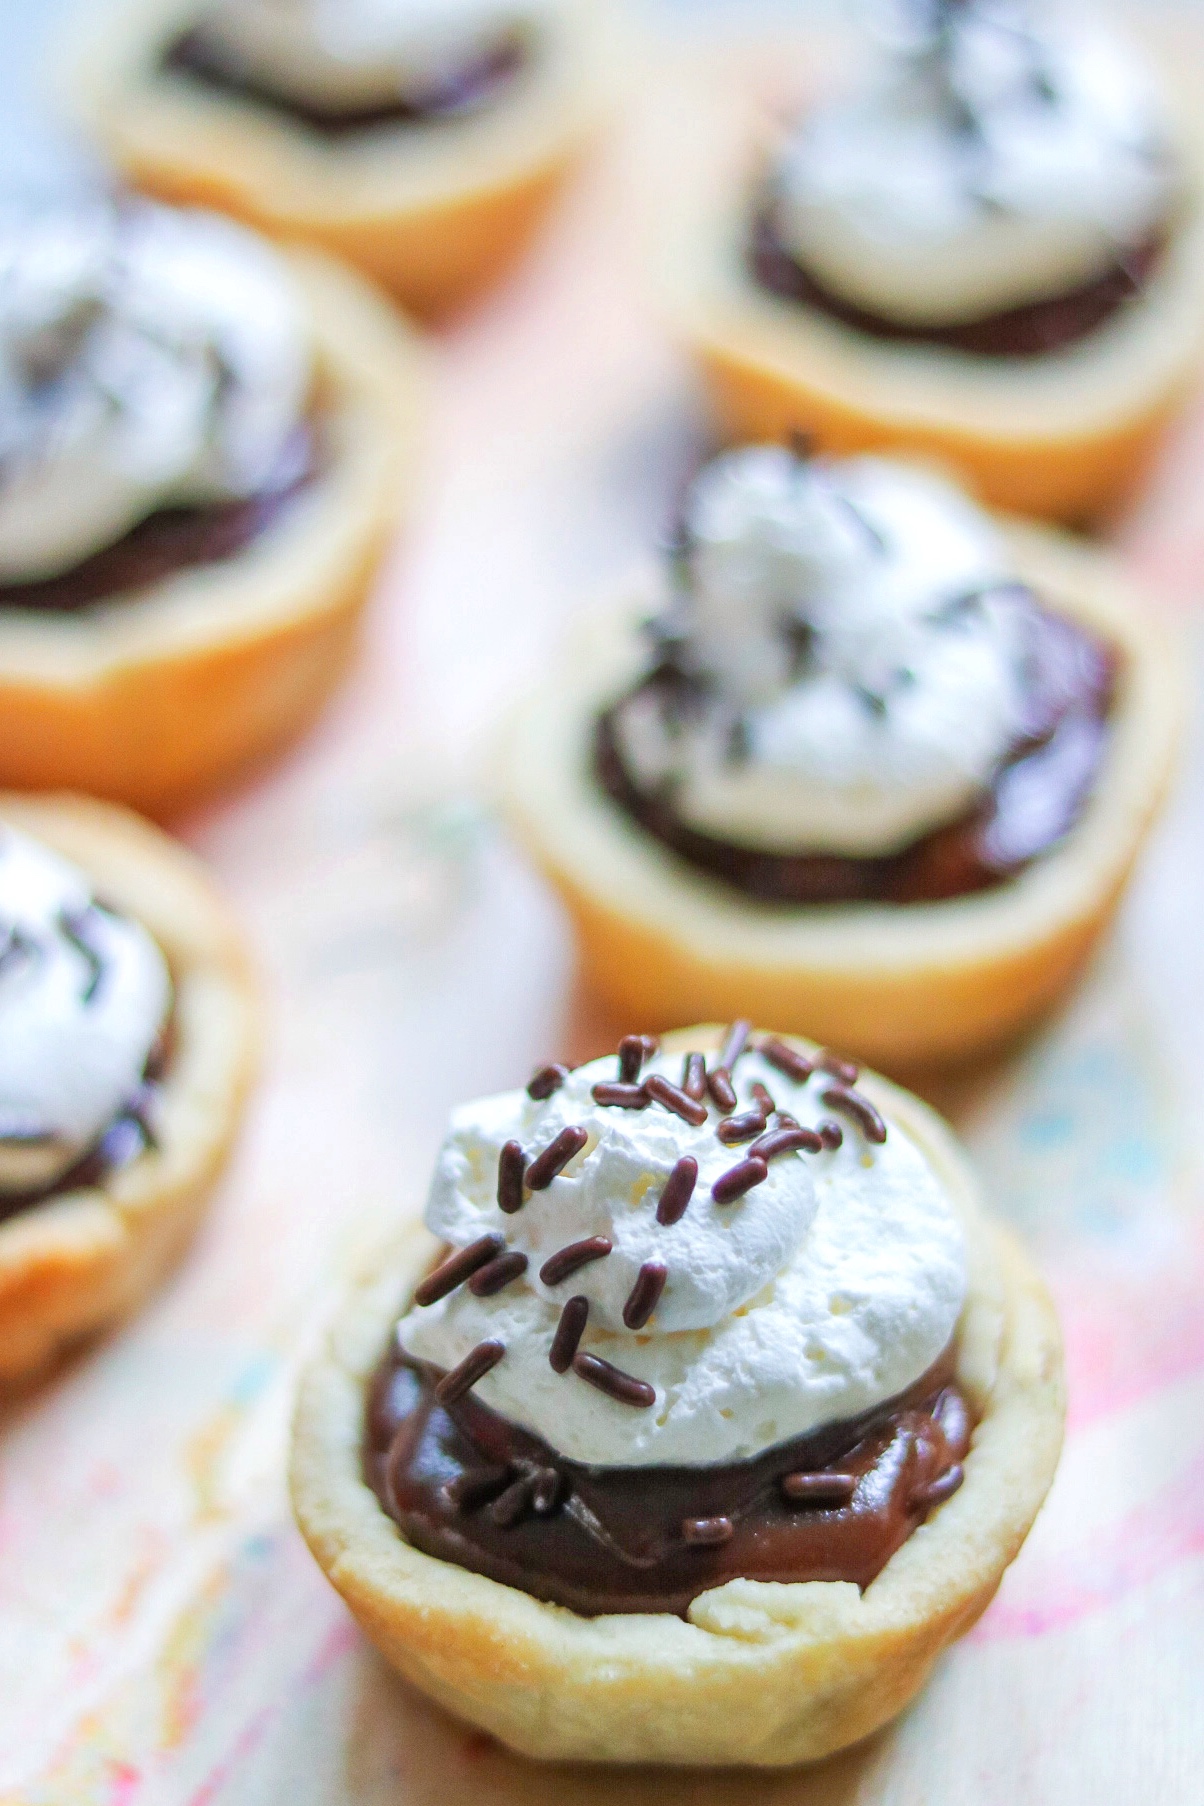
Once the mini chocolate pudding pies are set, top them with thawed Cool Whip whipped topping and chocolate sprinkles. You can serve your mini chocolate cream pies right then and there, or refrigerate the individual chocolate pies until you are ready to serve them.
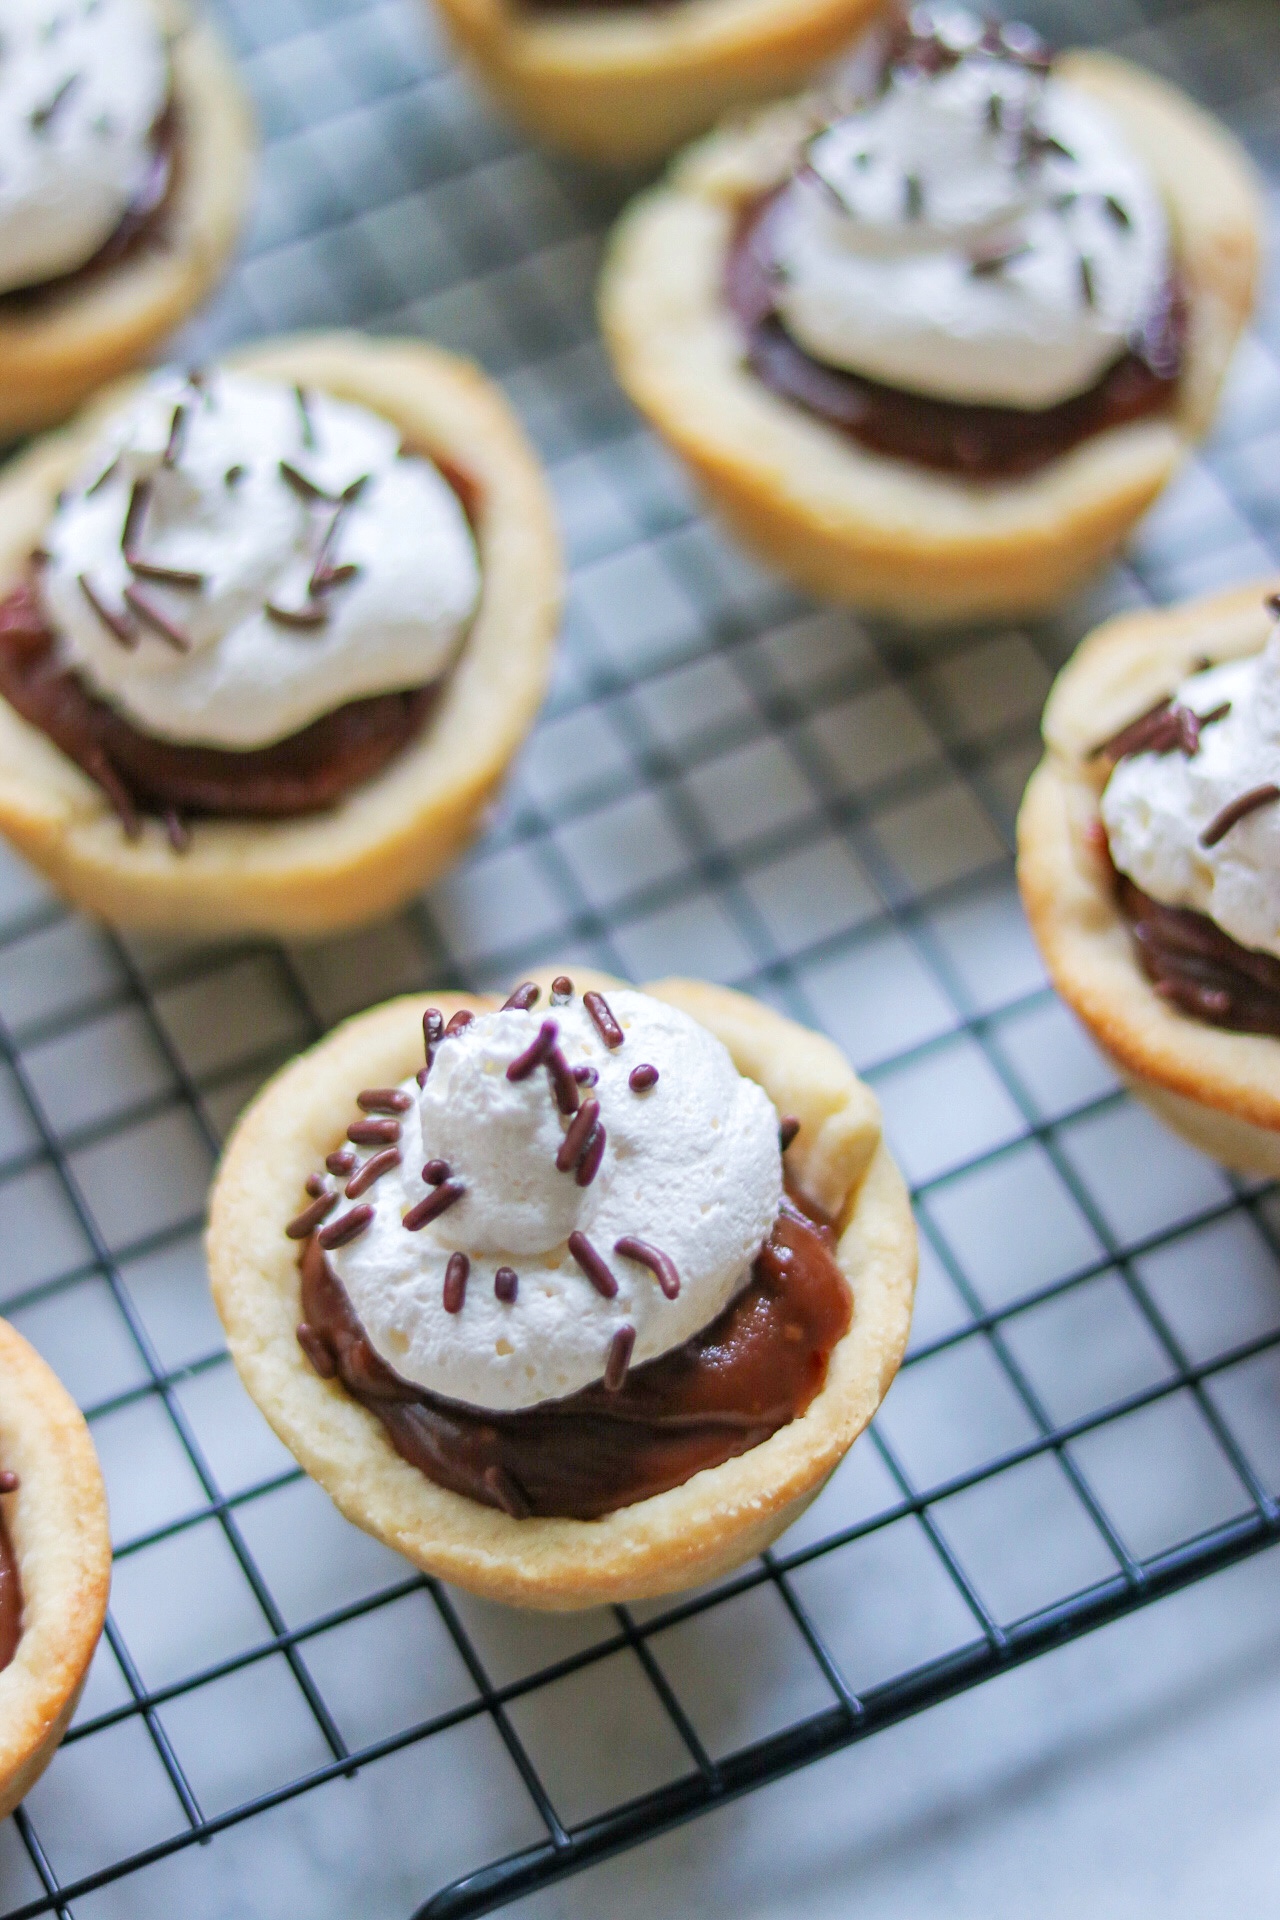
This mini chocolate cream pies recipe is a favorite!
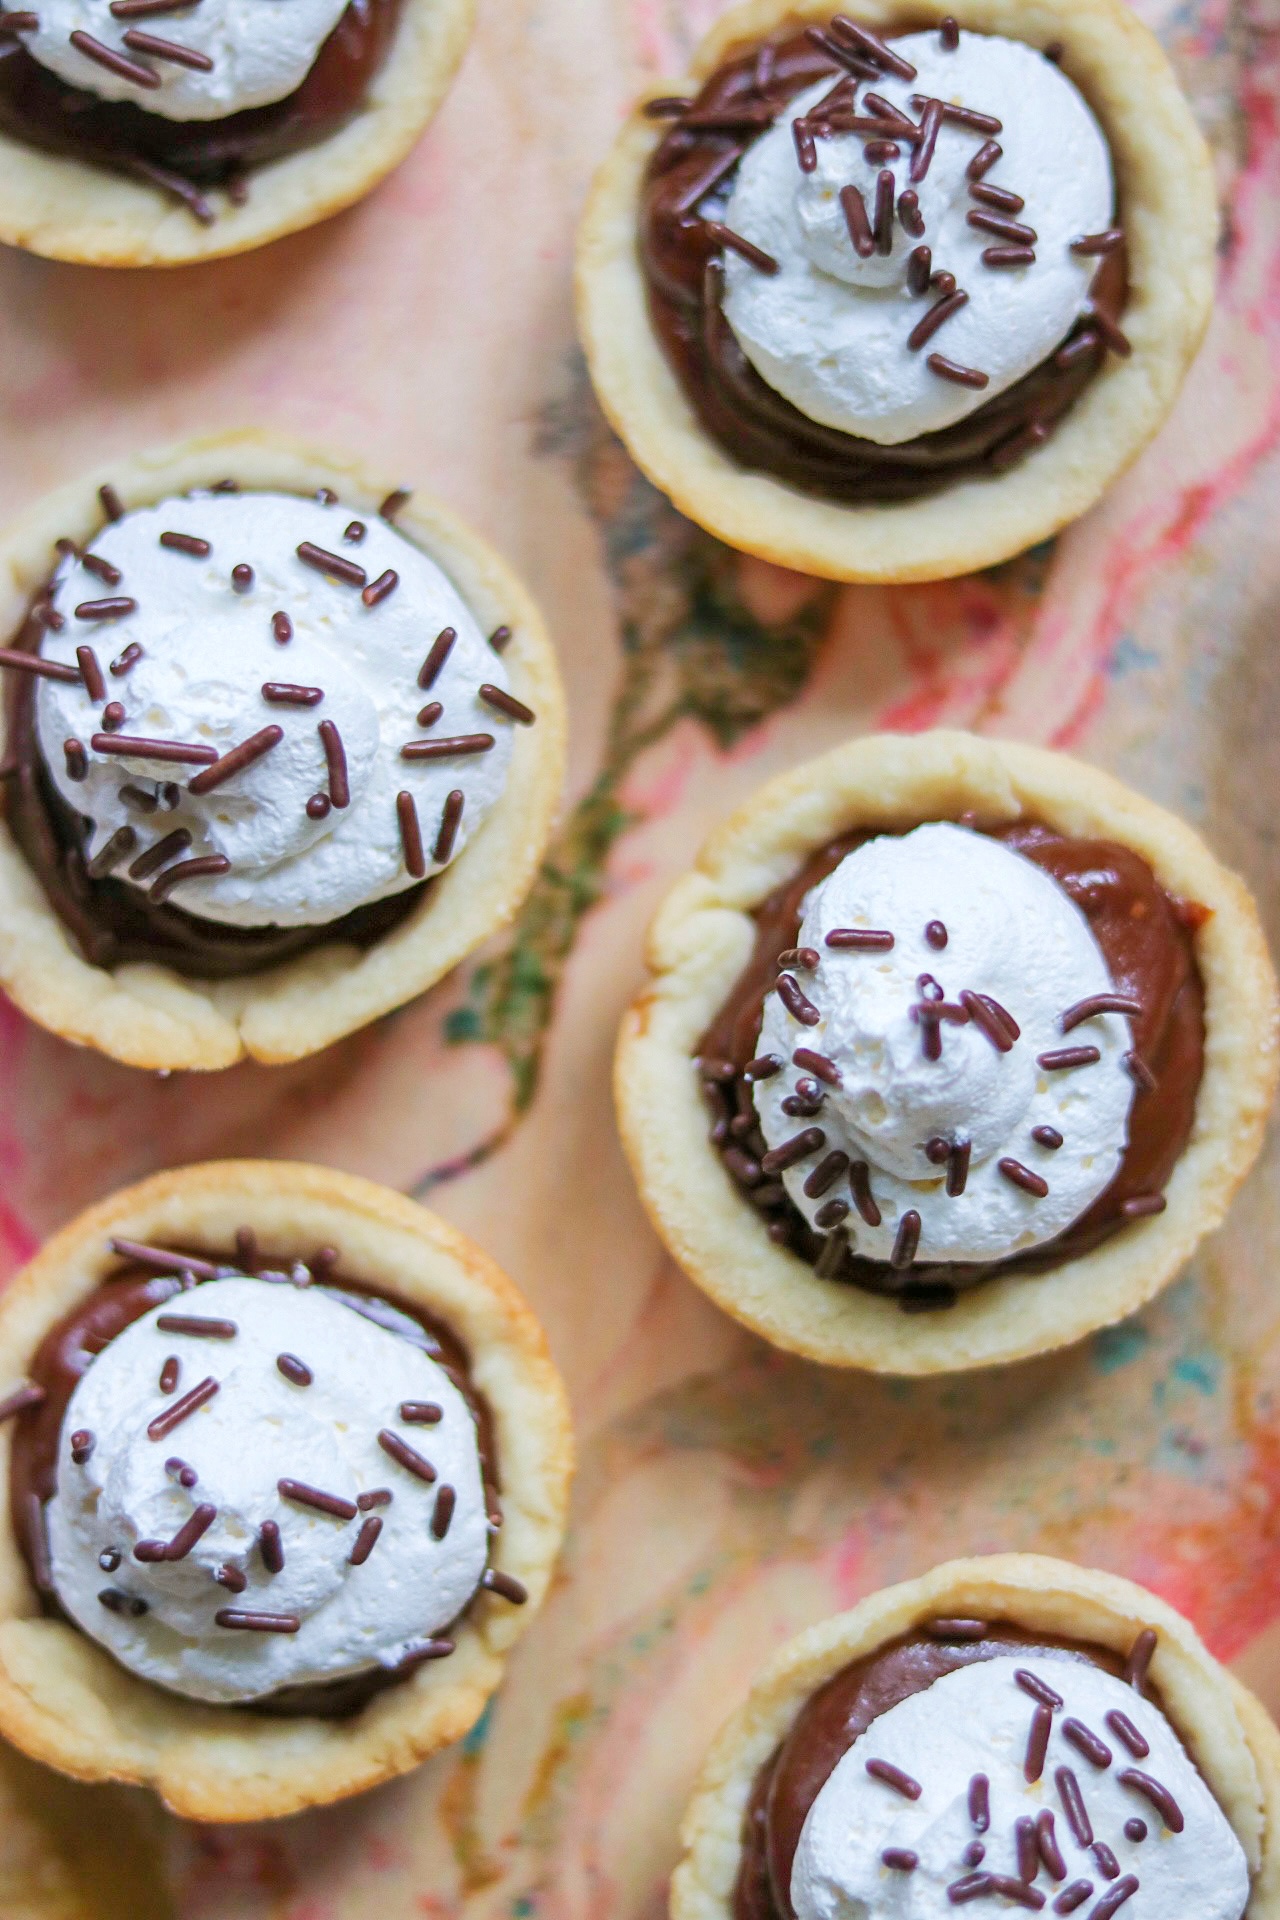
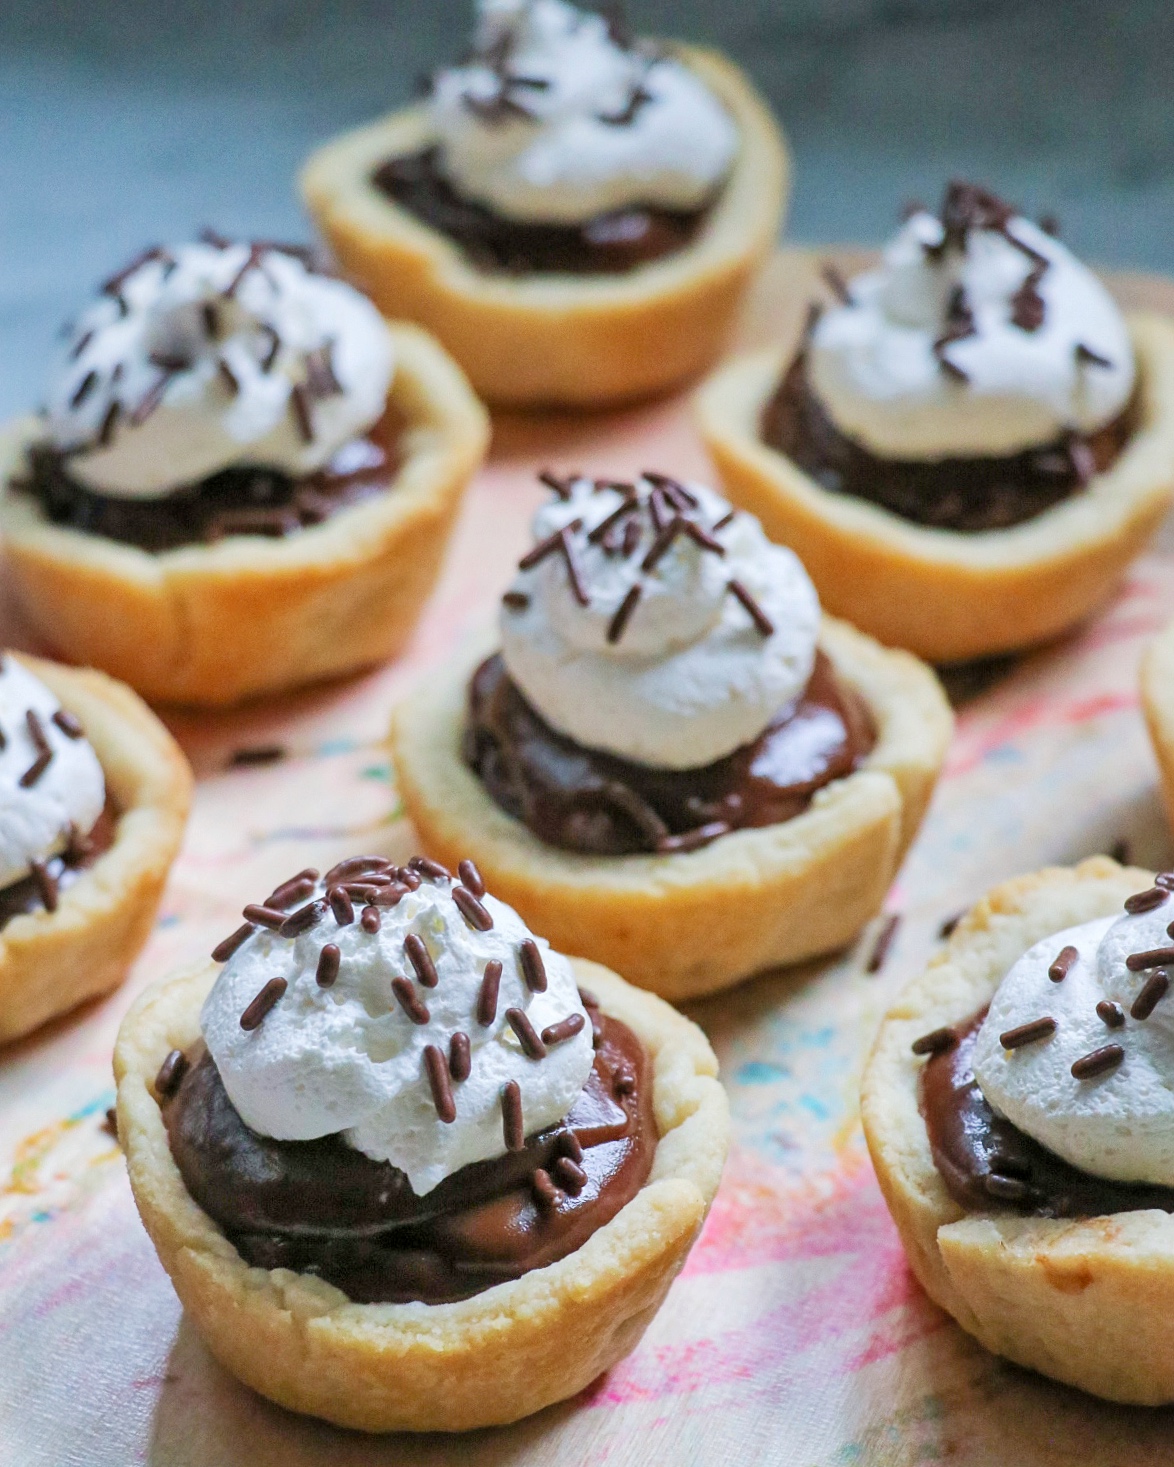
How adorable are these individual chocolate pies?
Here’s the Mini Chocolate Pies recipe! Enjoy, and please leave a rating if you love this mini chocolate cream pies recipe as much as we do.
Mini Chocolate Pies
I adapted my Aunt Clarica's family-favorite chocolate cream pie into mini individual chocolate pies for this recipe. These mini chocolate pies are so delicious, and perfect for parties.
Ingredients
For the Crust:
- 2 cups all-purpose flour
- 1 teaspoon salt
- 2/3 cup plus 2 tablespoons Crisco shortening
- 4-5 tablespoons cold water
For the Filling:
- 1 12-ounce can evaporated milk
- 1 cup sugar
- 3 egg yolks
- 3 tablespoons unsweetened cocoa powder
- 2 tablespoons all-purpose flour
- 1 tablespoon margarine
- 2 teaspoons vanilla extract
Toppings:
- Cool Whip whipped topping, thawed
- Chocolate sprinkles
Instructions
- Preheat the oven to 425 degrees F.
- Sift 2 cups of the flour and salt together into a large mixing bowl. Cut in the shortening thoroughly with a fork or pastry cutter. Stir in the water, starting with 4 tablespoons and adding up to a tablespoon more if the dough seems too dry.
- Gather the dough into a ball, then roll out onto a floured surface (rolling it slightly thinner than you would for a full-size pie crust). Cut 12 circles into the dough with a 4" circle cookie cutter.
- Press the dough circles into the cups of a 12-cup muffin tin. Prick the bottom and sides of the dough with a fork.
Bake in the preheated oven for 6-8 minutes, or until the dough is firm and lightly golden. Cool in the pan on a wire rack for 5 minutes before removing from the pan to cool on the wire rack completely. - In a heavy saucepan over medium heat, mix the evaporated milk, sugar, egg yolks, cocoa powder, and remaining 2 tablespoons of flour. Cook, stirring until the mixture has thickened (about 12 minutes). Add the margarine and vanilla and stir until the margarine has melted and is thoroughly blended into the mixture. Remove from heat.
- Transfer the chocolate filling to a large liquid measuring cup and let cool for a few minutes so it is warm but not boiling hot. Pour into the baked pie crusts, filling the crusts as much as you can. Cool the mini pies on the counter for 30 minutes before transferring to the refrigerator to cool for at least two more hours.
- Once the pies are set, top with whipped topping and chocolate sprinkles. Refrigerate until ready to serve.
Notes
If you don't have a 4" circle cookie cutter use the top of a large plastic cup.
More individual desserts like this mini chocolate pie recipe
- Mini Air Fryer Cherry Hand Pies
- Air Fryer Blueberry Hand Pies (blueberry mini pies)
- Nutella Hand Pies (air fryer chocolate hand pie recipe)
- Air Fryer Mini Pumpkin Hand Pies (mini pumpkin pie bites)
- Mini Coconut Cream Pies
- Mini Key Lime Pie Bites
- Instant Pot Mini Cheesecake Bites
- Instant Pot Cinnamon Roll Cheesecake Bites (mini cinnamon roll cheesecakes)
- Coquito Balls (Caribbean-Style Coconut Rum Balls)
- Instant Pot Brownie Bites recipe
- Honey-Orange Crème Brûlée with Raspberries (Lighter Creme Brulee Recipe)
- Lemon Panna Cotta with Blueberries
- Caramel Apple Panna Cotta (cinnamon panna cotta recipe)
- Three-Ingredient Dairy-Free, Gluten-Free, Vegan Fudge Bites

Cherie says
I just made these for Christmas and they were a HUGE hit!!! I will adjust that I did cheat and used ready made pie crust to save some time and was able to get 12 out of it. They were delish and I was already told to make them for New Years Eve!
Ramona Cruz-Peters says
I am all about those shortcuts, too! Yay for saving time! I am glad you all enjoyed them so much. Thanks for sharing!
Barbara says
Your tip with parchment paper is genius!! Thank you!!!
Ramona Cruz-Peters says
Thank you! Some nonstick pans work just fine without it, but I like it because it comes out of the cups so easily this way, making the crusts stay pretty for serving at a party!
Kathy Walsh says
Just wondering if I could make these ahead for Thanksgiving? I thought I’d make the crust on Monday, and keep it in the fridge and bake them on Tuesday. If I fill them and put them back in the fridge without the cream topping, will they keep until Thursday?
Ramona Cruz-Peters says
Yes, you can make it ahead! I recommend keeping the crust at room temp on the counter, covered with plastic wrap (after it’s cooled completely) to keep it fresh. No need to refrigerate. Then after you add the chocolate filling, cover with plastic wrap and refrigerate. Add the whipped cream on Thursday!
April says
I made these for Thanksgiving and they were yummy! My family requested more for Christmas.
Ramona Cruz-Peters says
I’m so happy to hear that!!
Kyle says
We made this recipe tonight to take to our families Thanksgiving and the pudding never set. Such a sad time because the pudding base tasted amazing.
Ramona Cruz-Peters says
I’m so sorry to hear that! I’ve never personally experienced that in all our years making this (as either a full pie or these individual pie bites), so I don’t know what might have gone wrong.
Janice says
Do you use margarine or butter?
Ramona Cruz-Peters says
I use margarine! This is adapted from my Aunt’s family recipe, and that’s what she always used.